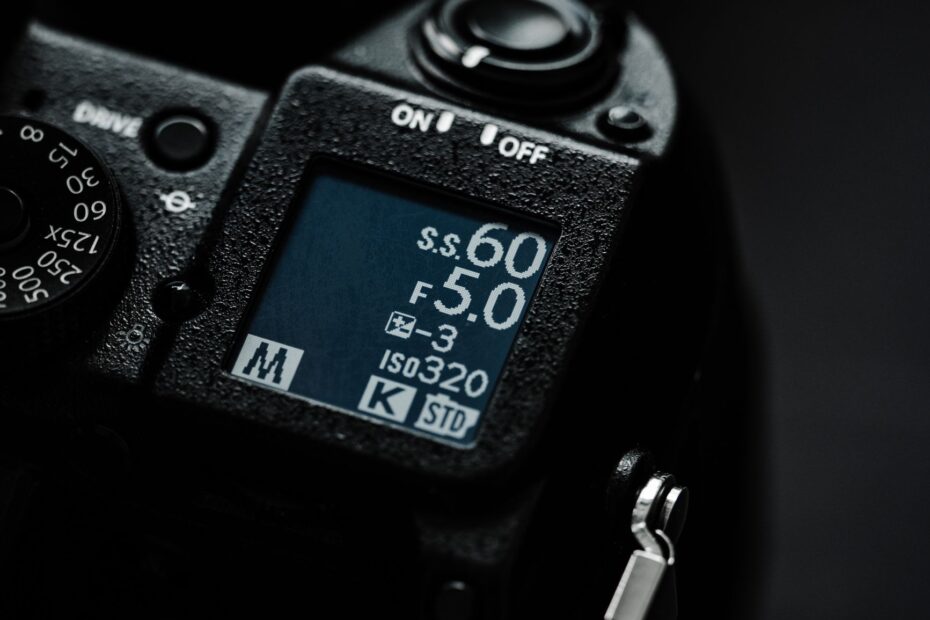
A wider lens opening changes depth of field, while a longer exposure determines how long light reaches the sensor. Both change brightness, yet aperture changes depth of field and shutter speed changes motion blur in your photo.
You’ll learn how aperture, shutter time, stops of exposure, ISO, camera metering, and scene priorities shape portraits, landscapes, action shots, handheld low light, and phone photos.
Two Exposure Controls Have Different Jobs
A window portrait can look soft at f/2.8, then look sharp from face to background at f/8 without moving your subject. F-stop measures aperture size, while shutter speed measures the time your camera shutter stays open.
Both settings send light toward the sensor or film, so they can produce a similar meter reading. Your lower f-number brightens an image through a wider aperture, while a slower shutter brightens it through a longer exposure.
| Control | What it measures | How it appears | Main visual effect |
|---|---|---|---|
| F-stop | Aperture opening size | f/1.8, f/2.8, f/5.6, f/11 | Depth of field and background blur |
| Shutter speed | Exposure duration | 1/1000 s, 1/250 s, 1/30 s, 1 s | Motion freezing or motion blur |
| Lower or slower setting | More light reaches the sensor | f/2.8 or 1/30 s | Brighter exposure through different controls |
| Higher or faster setting | Less light reaches the sensor | f/16 or 1/1000 s | Darker exposure with a different visual trade-off |
That shared brightness result creates the real f-stop vs shutter speed choice. You use aperture to decide how much of the scene stays sharp, while shutter time decides whether a runner, wave, or passing car stays defined or streaks through the frame.
Exposure Is the Shared Result
Your light meter reads the light reaching the sensor, not your creative reason for selecting a setting. It reads f/4 at 1/250 s and f/2.8 at 1/500 s as equal exposures, even though background detail and motion can look very different.
A correct meter reading does not fix every visual problem. A sharp face against distracting scenery points toward aperture, while a blurred child or soft bird wing points toward shutter speed.
F-Stop Measures the Lens Opening
Inside your lens, overlapping blades form an adjustable iris. That opening is the aperture, and an f-stop is an aperture ratio tied to the lens focal length.
Your lens does not show aperture size in a simple left-to-right scale. The number runs opposite to the visual result: smaller f-numbers mean wider openings and more light.
The Inverse Number Rule Explains Brighter Lower F-Stops
At f/2.8, the aperture opening is wide and sends more light toward your sensor. At f/8, the opening is smaller and sends less light.
Your f/16 setting uses a narrow opening, which darkens exposure beside f/2.8. Think of the f-number as a fraction: a smaller denominator produces a larger opening, so you do not need optical math to work with the scale.
| F-stop | Aperture opening | Light reaching your sensor | Typical visual use |
|---|---|---|---|
| f/1.8 | Very wide | High | Portrait separation in dim light |
| f/2.8 | Wide | High | Events, portraits, and selective focus |
| f/5.6 | Medium | Moderate | Small groups and daily scenes |
| f/8 | Narrower | Lower | Scenes needing broader sharpness |
| f/16 | Narrow | Low | Bright landscapes with deep focus |
An F-Stop and a Stop of Light Differ
Language causes part of the confusion. An f-stop can name an aperture setting such as f/4, while a stop of light means a doubling or halving of exposure through aperture, shutter speed, or ISO.
Moving from f/2.8 to f/4 removes one stop of exposure. Moving from f/4 to f/5.6 removes another stop, and your camera can show one-third-stop values such as f/3.2 or f/3.5 for smaller changes.
A wide aperture solves a light shortage, but it also narrows the sharp zone around your focus point. That trade-off is why aperture deserves a creative choice rather than a quick brightness correction.
Aperture Shapes Depth of Field and Background Blur
A face can stay crisp while city lights behind it turn into soft circles at f/1.8. That look comes from shallow depth of field, the limited zone in front of and behind your focus point that appears acceptably sharp.
Your depth of field changes through aperture, focus distance, focal length, and sensor size. A wide aperture is only part of the result.
Wide Apertures Separate Your Subject
At f/1.8 or f/2.8, you can separate a person from a crowded background. Place your subject several feet ahead of the background and focus on the nearer eye, because that distance strengthens the blur more than aperture alone.
Your focal length also changes the look. An 85mm lens at f/2.8 can blur a distant background more strongly than a 24mm lens at f/2.8 from the same position, and moving closer reduces depth of field further.
A full-frame Canon, Sony, or Nikon camera can show more background blur than a smaller-sensor camera at matching framing and f-number. Matching the frame changes either focal length or camera distance, which changes the final depth of field.
Narrow Apertures Hold More Distance in Focus
At f/8 through f/16, more of a scene can appear sharp from foreground to horizon. Your landscape scene benefits from that added depth, especially with rocks close to the lens and mountains far behind them.
Very small openings such as f/22 can reduce fine detail through diffraction. Light spreads at the tiny aperture edge, so f/8 or f/11 gives many lenses useful depth of field without pushing that softening effect.
Focus distance matters as much as the f-number. A foreground flower 18 inches from your lens can stay soft at f/11 while distant hills look sharp.
Depth of field answers what should stay clear in your frame. Motion asks a separate question: how much your subject moves while the sensor receives light.
Shutter Speed Sets Exposure Time
A camera shutter open for 1/1000 s gives a soccer ball little time to move across the sensor. A 1 s exposure gives headlights enough time to draw long lines through a dark street scene.
Fast and slow shutter settings change both brightness and motion rendering. Your subject speed, focal length, and camera support decide how much time you can allow.
Fast Shutter Times Hold Action
Fast shutter speeds reduce incoming light. At 1/1000 s, your camera receives one-thousandth of a second of light and can freeze quick action, provided your aperture and ISO supply enough exposure.
Your subject does not need to play a sport for speed to matter. A laughing toddler, dog shaking water, or hands turning a steering wheel can blur at 1/125 s, so faster movement needs a faster shutter.
Slow Shutter Times Record Movement
At 1/4 second, extra light reaches the sensor while moving subjects blur across the frame. At 1/30 s, walking feet can blur, while a 1 s stream exposure turns water smooth if your camera stays steady.
Two blur sources need separate attention. Subject motion blur comes from your subject moving, while camera shake comes from your hands shifting the camera during exposure.
Image stabilization helps your hands hold a slower shutter speed, yet it cannot freeze a moving child, athlete, bird, or vehicle.
A tripod can reduce camera shake, but it cannot stop a cyclist from moving. Your shutter choice still needs to match the motion in front of the lens.
Motion Rendering Changes With Shutter-Speed Choices
A 1/250 s exposure can hold a standing portrait steady, yet it can blur a drummer’s hands. Motion rendering depends on how far your subject travels during exposure, not on a scene label such as portrait or sports.
Useful Starting Ranges
- Still portraits: Start near 1/125 to 1/250 s, then raise speed for restless hands, windblown hair, or longer lenses.
- Walking subjects: Start near 1/250 s for a clean stride, while brisk movement can need 1/500 s.
- Field sports: Start near 1/1000 s for running athletes, then use 1/2000 s for fast ball action.
- Flowing water: Use 1/250 s to hold droplets or 1/2 s to smooth a waterfall with stable support.
- Light trails: Use 2 to 10 s on a tripod so vehicle lights cross your frame as continuous lines.
Your results set the real threshold. A bird flying toward you can need 1/2000 s, while a slow heron standing at the shoreline can look sharp near 1/500 s.
The Reciprocal Rule Limits Camera Shake
With a 50mm lens, 1/50 second provides a handheld starting point for limiting camera shake. Use a shutter speed at least as fast as one divided by your focal length: 1/50 s for 50mm and 1/200 s for 200mm.
Crop-sensor cameras need a focal-length adjustment. A 200mm lens on an APS-C Canon body gives a narrower view than 200mm on full frame, so 1/320 s or 1/500 s is a safer handheld starting point.
Your stabilized lens or in-body stabilization can permit slower handheld exposures for still scenes. A stabilized 85mm lens can keep a park bench sharp at 1/20 s, yet a walking person remains blurred.
Camera shake and subject movement are separate limits. The reciprocal rule addresses your hand movement, not the motion of a child, bird, athlete, or vehicle.
Once motion sets a minimum exposure time, lens opening becomes the main way to rebalance brightness.
Stops Connect Aperture and Shutter Speed
Each full stop doubles or halves the light reaching your sensor. Opening aperture from f/4 to f/2.8 doubles the light, and slowing shutter speed from 1/250 s to 1/125 s also doubles the light.
| Full-stop change | Aperture sequence | Shutter sequence | Exposure result |
|---|---|---|---|
| More light | f/8 to f/5.6 | 1/250 s to 1/125 s | Twice as much light |
| More light | f/5.6 to f/4 | 1/125 s to 1/60 s | Twice as much light |
| More light | f/4 to f/2.8 | 1/1000 s to 1/500 s | Twice as much light |
| Less light | f/2.8 to f/4 | 1/500 s to 1/1000 s | Half as much light |
Equivalent Exposure Keeps Brightness Stable
Equivalent exposure settings produce the same meter reading through different aperture and shutter pairs. Moving from f/4 at 1/250 s to f/2.8 at 1/500 s keeps brightness stable because one stop gained equals one stop removed.
Your photo does not look identical after that exchange. The f/2.8 setting gives shallower depth of field, while 1/500 s holds fast action more cleanly; that is the working heart of aperture vs shutter speed.
ISO completes the exposure triangle. Raising ISO from 400 to 800 adds one stop of brightness by amplifying the captured signal, though higher ISO can add visible noise and reduce fine color detail.
Metering and Exposure Compensation Fine-Tune Brightness
Your light meter can misread a white wedding dress, snow, a dark suit, or a backlit window. Exposure Compensation tells Aperture Priority or Shutter Priority mode to place the meter result brighter or darker while your selected priority remains in place.
Set your visual priority before touching Exposure Compensation. For a backlit face, +1 exposure compensation can brighten your subject while the camera changes the non-priority control, but bright skies can clip before your screen reveals the loss.
The meter handles brightness, while you decide the image character. Depth of field and motion blur remain the choices that shape the frame.
A Priority-First Method Sets Your Starting Control
Start with the visual feature your photo cannot lose. A portrait against a cluttered background needs depth control, while a basketball player in midair needs motion control.
Your meter helps after that choice. This order keeps brightness from pushing you toward a setting that ruins the look you wanted.
Aperture Leads Depth-Driven Photos
Choose Aperture Priority mode, marked A or Av on many cameras, for portraits, food, close details, and landscapes. You select the f-number, then your camera selects shutter speed from its light meter reading.
Your portrait can begin at f/2.8, while a group of four people in two rows can need f/5.6 or f/8 so more faces stay sharp. A landscape with near and far detail can begin near f/8 or f/11.
Shutter Speed Leads Motion-Driven Photos
Select Shutter Priority mode, marked S or Tv, for sports, wildlife, handheld low light, and intentional blur. You select exposure time, then your camera selects the aperture needed for the available light.
Your screen can warn that the lens has reached its widest or narrowest aperture. That warning means the available light cannot meet your shutter choice at the current ISO, so you need a higher ISO, brighter light, or a different shutter target.
Manual Mode Follows a Clear Order
- Choose visual priority: Set f-stop for depth of field or shutter speed for motion before chasing the meter.
- Set paired control: Move the remaining setting until your light meter reaches the exposure level you intend.
- Inspect the limits: Look for shutter times too slow to handhold or apertures too wide for your needed focus depth.
- Raise ISO last: Raise ISO after aperture and shutter choices protect the visual result you need.
- Inspect the frame: Zoom into eyes, moving edges, and bright highlights rather than trusting screen brightness alone.
Manual mode gives you direct control over every part of the exposure triangle. Your live histogram adds another check by showing bright tones packed against the right edge or shadows pressed against the left edge.
Those readings become especially useful when a scene forces you to favor one visual priority over another.
Common Scenes Need Different Trade-Offs
A setting that works at noon can fail under gym lights or at sunset because available light changes. You can keep the same priority method, then shift settings for the specific scene.
Portraits, Sports, and Landscapes Need Different Priorities
For a single portrait, begin near f/2.8 or f/4 and keep shutter speed above 1/125 s for a still subject. Your 85mm lens can need 1/160 s or faster handheld because longer focal lengths magnify camera shake.
For sports, begin near 1/1000 s, then open the aperture as wide as your lens allows before raising ISO. A gym photo at f/2.8, 1/1000 s, and ISO 3200 can look cleaner than a brighter 1/250 s frame with blurred action.
For landscapes, start near f/8 or f/11 and place your camera on a tripod as light falls. Your shutter can lengthen to 1 s or more for still scenery, though moving branches and waves still blur.
Handheld Low Light Shows the Trade-Off
Handheld low-light scenes expose the limits of every setting. Set the slowest shutter that holds your subject still, then open your aperture and raise ISO only after those choices protect sharpness and the depth of field you want.
Your phone can limit the same choice. Many phones have fixed apertures, so Pro or Manual modes can expose shutter and ISO controls without giving you the aperture range of an interchangeable-lens camera.
Computational processing can brighten a phone image, but moving subjects still need enough real shutter speed. Your phone’s fixed aperture means shutter time and ISO carry more of the exposure work.
Neutral-density filters help in bright light where your selected settings admit too much light. A neutral-density filter works like sunglasses for your lens, allowing f/1.8 in daylight or a multi-second waterfall exposure; Kolari Pro ND Filters are one example in this category.
The 20-60-20 Rule Is Not an Exposure Law
The 20-60-20 rule appears as photography shorthand in some discussions, but it has no universal technical meaning for aperture, shutter speed, and ISO. Your camera, lens, subject movement, and available light matter more than a memorized number pattern.
Use a direct choice instead: select depth of field for a static scene, select motion rendering for a moving scene, then shift brightness in equal stops of exposure. That habit gives you a stronger result than treating shorthand as a fixed formula.
Final Look at Exposure Choices
One exposure goal links these controls, yet each creates a distinct visual effect. Set aperture for the amount of focus depth you need, set shutter speed for the motion you want to show, then use ISO to close the brightness gap.
Your light meter can point toward a balanced exposure, but it cannot select your creative priority. A sharp subject, controlled background, or intentional motion trail starts with the control that protects your intended frame.
FAQ
Is f-stop the same as shutter speed?
No. F-stop names the aperture opening inside your lens, while shutter speed names the length of time light reaches your sensor or film. Both alter exposure, but your f-stop affects depth of field and shutter speed affects motion blur.
What is the difference between aperture and shutter speed?
Inside the lens, an adjustable opening controls light volume, while exposure time determines how long the sensor receives it. Aperture changes focus depth and background blur, while shutter speed changes how movement appears in your frame.
How do f-stop and shutter speed each affect brightness?
A lower f-number brightens your photo through a wider aperture, while a slower shutter brightens it through a longer exposure. Opening from f/4 to f/2.8 adds one stop of light, and slowing from 1/250 s to 1/125 s adds one stop too.
Why do lower f-stop numbers create a brighter image?
That describes a larger aperture opening because the value is based on a ratio. At f/2.8, the opening is wider than at f/8, so more light reaches your sensor during the same shutter duration.
What happens when you use a fast versus slow shutter speed?
A fast shutter speed limits light and can freeze quick motion, such as a soccer ball at 1/1000 s. A slow shutter speed admits more light and records movement, such as water blur at 1/2 s or vehicle trails across a 2 to 10 s exposure.
Is it better to adjust aperture or shutter speed?
Your subject determines the stronger choice. Adjust aperture for background blur or broad scene sharpness, and adjust shutter speed for action, handheld stability, or deliberate blur. Set the other control for meter balance, then raise ISO only when needed.