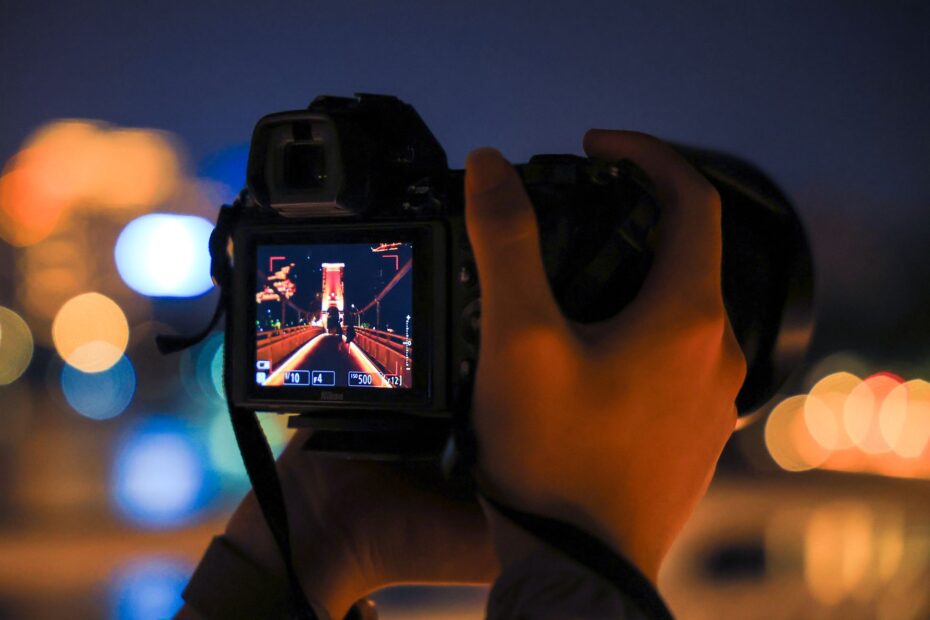
At a given focus point, the zone in front of and behind it can appear acceptably sharp. Aperture, camera-to-subject distance, magnification, and focus placement shape that zone, while areas beyond it soften in gradual steps rather than at a hard edge.
You’ll learn how those controls affect portraits, landscapes, close-ups, phone photos, and technically demanding scenes where a few inches can change the result.
Acceptable Sharpness Extends Beyond the Focus Plane
Your lens creates one exact plane of focus on the sensor, yet nearby subjects can still look sharp in the finished image. That visible range is what is depth of field in photography: a practical zone where blur remains small enough for your intended display size and viewing distance.
Blur Falls Away in Gradual Steps
A focus plane works like a sheet of glass crossing the scene. Place a flower on that plane and its detail receives the sharpest rendering. A petal 2 inches closer or farther away can still look crisp at f/11, while a nearby leaf or distant branch turns visibly soft.
Fence posts show the shift clearly. Set focus on a middle post, inspect the image at full size, and sharpness fades toward the front and rear of the row. Your image has no physical border where clarity suddenly stops; blur grows as subjects move farther from the focus plane.
At wide apertures, a small shift in camera position can move sharp focus from an eye to an eyelash. Brace your stance before focusing on close subjects.
The Circle of Confusion Sets the Sharpness Threshold
A blurred point becomes a small disk on the sensor, called a circle of confusion. The acceptable zone begins where that disk still looks like a point at a chosen display size. Large prints and close viewing reveal blur that looked harmless on a phone screen.
| Scene position | Optical result | What your finished image shows |
|---|---|---|
| At the focus plane | Smallest projected detail | Highest visible sharpness |
| Near the focus plane | Small blur disks | Acceptably sharp detail |
| Farther from focus | Wider blur disks | Noticeable softness |
| Well beyond the usable zone | Large blur disks | Strong foreground or background blur |
Your sensor format affects the circle-of-confusion standard, but output size matters too. A 24-megapixel Canon EOS R6 image viewed at 100 percent reveals finer softness than a small web image. The optics stay the same, while your tolerance for blur changes.
Because blur tolerance changes with output size, the same focus choice can either guide attention or appear distracting.
Shallow and Deep Focus Direct Attention Differently
That gradual fade gives you a visual choice. A narrow sharp zone isolates a face from a busy street, while a broad zone keeps a trail, foreground rock, and distant ridge connected. Your focus range shapes attention before color grading or editing enters the frame.
Shallow Focus Reduces Background Competition
Shallow depth of field leaves only a slim slice of the scene acceptably sharp. A portrait at 85mm and f/1.8 can keep both eyes clear while distant traffic lights become soft circles. Your subject stands apart because nearby detail loses its edge.
Subject-to-background distance changes the visible character of blur. Place your subject 8 feet from a wall rather than 18 inches from it, and the wall appears softer at the same aperture. You are changing the background’s size in the frame as well as its out-of-focus appearance.
Deep Focus Holds Place and Scale Together
Deep depth of field keeps a larger share of the scene usable. A canyon overlook at f/11 can show textured rock near your feet and a distant river bend. Your eye can travel through the frame from foreground to horizon without losing key detail.
| Focus style | Sharp area | Visual use | Common example |
|---|---|---|---|
| Shallow | Small slice around focus | Directs attention to one detail | Face, flower, food detail |
| Moderate | Subject plus nearby space | Keeps a person and setting legible | Environmental portrait |
| Deep | Large near-to-far range | Shows scale and location | Landscape or architecture |
Shallow vs deep depth of field is separate from bokeh. Depth of field describes how much appears sharp, while bokeh describes the appearance of the blur itself. Aperture-blade shape and lens design can produce smooth highlights, polygonal highlights, or busy edges beyond the sharp zone.
Aperture, Distance, and Magnification Set the Sharp Zone
Three practical controls explain most changes you see in the frame: aperture, camera-to-subject distance, and magnification. Aperture changes the width of the light path. Distance and magnification change how severely small focusing errors appear in your composition.
Aperture Changes Blur Disk Size
An f-stop is a ratio, so the scale runs opposite to casual intuition. f/1.8 is a wide opening, while f/11 is a narrow opening. A wide opening sends light through a broader portion of the lens and produces larger blur disks away from the focus plane.
Your camera may show f/1.8, f/2.8, f/4, f/5.6, f/8, and f/11. Each full stop halves or doubles the light reaching the sensor. Move from f/2.8 to f/5.6 and your sharp zone expands, though shutter speed or ISO needs to account for reduced light.
Close Distance Tightens the Margin
Move from a 10-foot portrait to a 20-inch close-up and your usable sharp range shrinks quickly. At close range, focus changes much more sharply between the near edge and far edge of your subject. Your hands, subject movement, and camera movement all become more visible.
Magnification explains many close-focus surprises. A ring at life-size magnification can have less than a millimeter of usable sharpness, even at f/11. Jewelry, insects, and small product details expose that limit faster than a head-and-shoulders portrait.
- Open the aperture. Set f/1.8 or f/2.8 for a narrow sharp zone and stronger separation around your subject.
- Stop the lens down. Move toward f/8 or f/11 where your frame needs more near-to-far detail.
- Step closer. Reduce camera distance to make the sharp zone thinner around a small subject.
- Step back. Increase focus distance for a larger usable range, then crop or change focal length for framing.
- Separate the background. Leave several feet behind your subject so existing blur becomes more visible.
Those settings answer much of how to control depth of field, yet focal length still causes confusion. A 24mm lens and a 200mm lens do not produce the same visual result unless camera position and framing are part of the explanation.
Focal Length and Sensor Size Depend on Framing
A long lens appears to melt backgrounds because it enlarges a smaller portion of the scene. Focal length alone does not explain the result. Distance, framing, sensor size, and the final display determine what your eye sees.
Equal Distance and Equal Framing Produce Separate Results
Stand 8 feet from a portrait subject and switch from 50mm to 100mm without moving. The 100mm view crops tighter and magnifies background blur, so blur appears larger. Your subject also fills more of the frame, which means the two images do not share equal framing.
Match the framing instead by moving farther back with the 100mm lens. At the same aperture and final framing, depth of field can remain very similar between the two focal lengths. Your changed camera position still alters perspective, making the background appear more compressed.
| Setup | Camera position | What changes | Practical result |
|---|---|---|---|
| 50mm to 100mm, same distance | Unchanged | Subject magnification rises | Blur looks larger and frame tightens |
| 50mm to 100mm, same framing | Farther back with 100mm | Perspective shifts | Background appears compressed |
| Same lens, closer position | Closer | Magnification rises | Depth of field becomes thinner |
Sensor Size Changes the Framing Trade-Off
A larger sensor needs a longer focal length or a closer position to match framing from a smaller sensor. At the same framing and aperture, larger sensors produce shallower depth of field than smaller sensors. That is why full-frame portrait work can show more background blur than phone-camera work.
Your phone follows the same optical rules. Its short lens, small sensor, and wide view produce a deep natural focus range in normal scenes. Portrait mode adds computational blur after capture, yet it cannot alter the location where the original lens focused.
Do not blame focal length for missed focus. A longer lens magnifies your subject and your focusing error, so eye focus becomes more demanding even where calculated depth remains similar.
Focus Placement Sets the Near and Far Sharp Range
Sharpness has a front edge and a rear edge, and placement can matter more than a one-stop aperture shift. Outside close-up distances, usable sharpness extends farther behind the focus point than in front. Your autofocus point decides where that uneven range begins.
Portraits Need Eye-Level Precision
Focus on the nearer eye in a close portrait, especially at f/1.4 or f/1.8. The far eye may fall outside the sharp zone where the face turns toward the camera. Face-detection autofocus helps, but viewfinder confirmation still matters around side-lit eyelashes or sunglasses.
For a couple on one plane, set focus between their nearer eyes only where both faces sit at nearly equal distance. A person leaning 18 inches forward needs focus priority. You can close the aperture to f/4 or reposition the pair rather than relying on a thin margin.
Near and Far Placement Shift Available Detail
Take a trail scene at f/8 with a rock 4 feet away and mountains at infinity. Focus on the rock and much of your sharp range sits in front of it, leaving distant peaks softer. Focus farther into the scene and more usable detail moves toward the horizon.
Your lens distance scale can assist, though modern zoom lenses rarely show fine marks. Use live-view magnification for a stationary composition, inspect foreground detail, then inspect the distant area. A captured frame reveals focus errors before fading light narrows your options.
Depth of focus is a separate term from depth of field. Depth of field describes acceptable subject-side distance in front of the lens. Depth of focus describes the tiny sensor-side tolerance behind the lens, which matters more in optical design and camera assembly than ordinary composition.
Once the focus point defines the available range, exposure and distance choices determine how much of it remains usable.
Camera Settings Turn Focus Range Into a Deliberate Choice
A scene tells you how much sharpness it needs before your camera tells you which f-stop fits. Start with the detail that must remain clear, then set aperture, distance, focal length, and focus placement around that requirement. This order keeps aperture from becoming a habit.
A Practical Adjustment Sequence
- Mark the required area. Decide whether your frame needs one eye, two faces, a tabletop, or detail from foreground to horizon.
- Set the aperture. Pick a wide f-number for isolation or a narrower f-number for broader scene clarity.
- Choose your distance. Move closer for stronger separation or farther away for a wider range of acceptable sharpness.
- Set focal length. Frame your subject with the lens that gives the perspective and background scale you want.
- Place focus deliberately. Put the autofocus point on the nearest critical feature rather than high-contrast but irrelevant detail.
- Inspect the frame. Magnify a captured image after a critical shot and check the nearest and farthest required details.
One Subject at Two Distances Reveals the Shift
Use a coffee mug as a practice subject. From 3 feet away with a 50mm lens, f/1.8 can leave the logo sharp while the handle begins to soften. At f/5.6, more of the mug and desk surface enters the usable zone. At f/11, a nearby notebook can appear sharper too.
Move back to 8 feet without changing the 50mm lens. The mug becomes smaller in the frame, yet f/1.8 covers more of its depth because focus distance increased. You can crop later, but cropping enlarges blur in the final display.
| Distance to mug | Aperture | Visible sharpness pattern |
|---|---|---|
| 3 feet | f/1.8 | Logo sharp, handle and desk soften quickly |
| 3 feet | f/5.6 | Most mug detail stays clear |
| 3 feet | f/11 | Mug and more nearby objects appear clear |
| 8 feet | f/1.8 | A larger portion of the mug remains acceptably sharp |
Smartphone cameras follow the same physical pattern at close range. Bring your phone within 4 inches of a leaf and natural background blur becomes visible. Portrait mode adds simulated blur, while camera angle, close focusing, and background separation still shape the natural portion of the image.
Scene Type Sets the Sharpness Priority
Aperture choice becomes clearer after you name the detail that cannot turn soft. In a tight portrait, that detail is the nearer eye. In a group photo or landscape, your required detail spans a broader set of distances.
| Scene | Focus placement | Sensible aperture range | Priority |
|---|---|---|---|
| Tight portrait | Nearer eye | f/1.4 to f/2.8 | Face separation |
| Environmental portrait | Near eye or face plane | f/2.8 to f/5.6 | Person plus location |
| Group photo | Face near the middle depth | f/4 to f/8 | Sharp staggered faces |
| Landscape | Into the scene, not always infinity | f/8 to f/11 | Foreground and distance |
| Macro subject | Nearest critical detail | f/8 to f/16 | Millimeter-level placement |
Group Photos Need Depth Across Faces
A group arranged in two rows can defeat f/2.8, even against a distant background. Place faces on a similar plane where possible. A diagonal line from front to back demands more depth than a straight row, so f/5.6 or f/8 gives your composition room.
Your shutter speed still needs to stop movement. At f/8 indoors, raise ISO or add light rather than allowing a 1/30-second exposure to blur moving faces. Focus blur and motion blur have separate causes, but both damage the detail you meant to keep.
Macro Work Makes Placement Extremely Tight
At close magnification, even f/16 may leave a beetle’s antenna sharp while its eye softens. Rotate the camera so the sensor plane runs closer to the subject surface. That geometry places more detail inside the limited sharp zone without forcing an excessively narrow aperture.
Landscape needs can justify hyperfocal techniques, though diffraction eventually limits what smaller apertures can preserve.
For a macro subject that does not fit inside one thin focus range, capture several focused frames on a tripod and merge them with focus stacking software.
Hyperfocal Focusing and Diffraction Set Technical Limits
Landscape scenes expose the limit of focusing at infinity. Infinity focus keeps distant mountains sharp but can waste usable detail in front of them. Hyperfocal distance gives you a calculated focus point that reaches farther toward foreground detail.
Hyperfocal Distance Allocates the Available Range
Hyperfocal distance is a focus distance that keeps subjects from roughly half that distance through infinity acceptably sharp for a selected aperture and camera format. At f/11, a hyperfocal value of 10 feet means detail from about 5 feet through infinity can appear sharp under the chosen circle-of-confusion standard.
Your exact value changes with focal length, f-stop, sensor format, and the sharpness standard behind the calculation. A 24mm lens at f/11 has a much closer hyperfocal distance than a 100mm lens at f/11. Wide landscapes gain more from this method than distant telephoto scenes.
Field Tools Clarify Near and Far Limits
After you enter focal length, aperture, focus distance, and camera format, calculator apps show the near and far limits. For a critical sunrise composition, inspect those values before shooting and verify them with live-view magnification. Your camera’s depth-of-field preview button shows the stopped-down view, though its image may darken.
- Set output standards. Pick a stricter sharpness target for a large print than for a small online image.
- Check both extremes. Magnify the nearest required detail and farthest required detail in separate captured frames.
- Use a tripod. Keep framing fixed while checking focus placement, especially below 1/60 second.
- Bracket focus points. Capture several focus distances across a static scene rather than trusting one estimate.
- Watch diffraction. Stop down only as far as needed because tiny apertures spread light and soften fine detail.
Diffraction becomes more visible as the aperture narrows, with the exact point tied to sensor pixel pitch and final display size. f/16 can add needed depth, yet f/22 can soften leaves and distant texture enough to erase that gain. Focus stacking retains sharper frames at f/5.6 or f/8 across a broad distance range.
How depth of field works becomes useful once you treat sharpness as a limited resource. Choose where that resource belongs, set aperture and distance around that choice, then inspect the details your image cannot afford to lose.
Putting the Controls Together
Your lens does not decide the image alone. You decide which distance deserves clarity, then aperture, camera position, focal length, magnification, and focus placement shape the usable zone around it. A soft background works only where the subject is sharply placed; a sweeping view works only where near and far detail receive enough range.
Start each frame by naming the detail that must hold. That single decision gives your f-stop and focus point a purpose, whether you are photographing an eye at f/1.8, a mug from 3 feet away, or a ridge line beyond a foreground rock.
FAQ
What is depth of field in photography?
In a portrait focused on the eyes, only part of the photograph may look sharp enough to your eye. Your focus point sits inside that area, with usable sharpness in front and behind it. Aperture, camera-to-subject distance, magnification, and focus placement decide how wide that area appears.
Can you explain depth of field in a simple way?
That is the part of your photograph that looks sharp enough to your eye. Your focus point sits inside that area, with some usable sharpness in front and behind it. Wider apertures and close camera distances make the area thinner, while narrower apertures and greater distances make it broader.
What three controls set depth of field?
Aperture, camera-to-subject distance, and magnification are the three main practical controls. Your focal length and sensor size affect framing and magnification choices, so they influence the final appearance too. A wide aperture, close position, or high magnification gives you a thinner sharp zone.
How do you adjust the depth of field?
Set a wider aperture such as f/1.8 for less sharp range, or use f/8 and f/11 for more. Moving your camera closer narrows that range, while stepping back broadens it. You can also change background separation to make existing blur look stronger or weaker.
How do you calculate the depth of field?
Enter your focal length, aperture, focus distance, and camera format into a depth-of-field calculator. The result gives near and far limits based on a circle-of-confusion standard. For critical work, use the calculation as a starting point, then inspect magnified captured frames at the intended composition.
Does a lower f-stop create a blurrier background?
A lower f-stop such as f/1.8 creates a wider aperture and larger blur disks outside the focus plane. Your background will appear blurrier where it sits far behind the subject. Subject-to-background distance also matters, so an 8-foot gap shows more visible blur than an 18-inch gap.