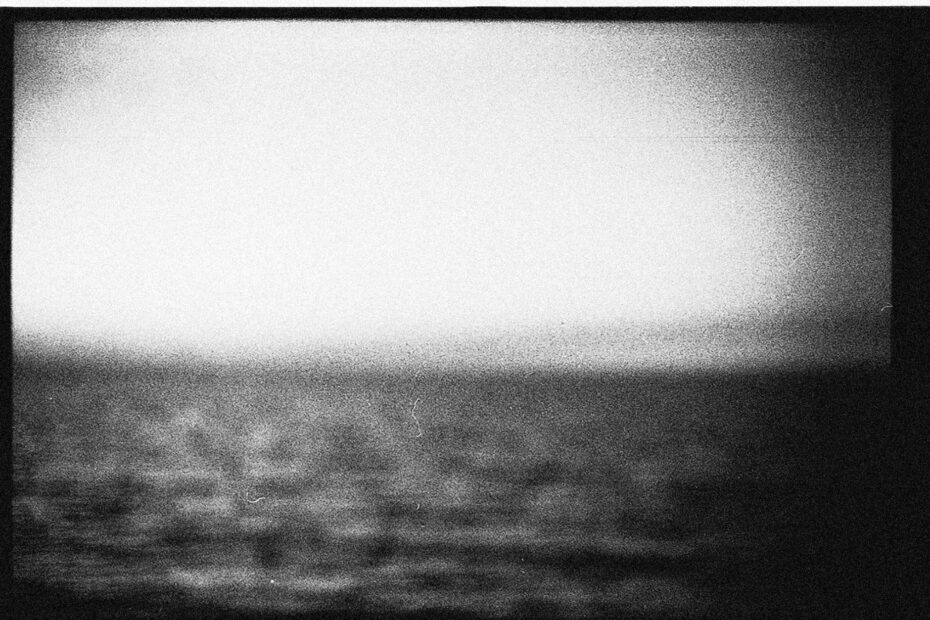
In dim scenes, a weak sensor signal creates random brightness or color variation when too little light reaches the camera. It shows up as rough texture, colored flecks, or blotchy shadows, turning a smooth wall, dark sky, or indoor portrait background into a gritty surface.
This explanation helps you trace the source during capture or editing, then keep more detail in low-light photography, long exposures, and smartphone photos.
Weak Light Starts the Problem Before Camera Settings Do
Light Supplies the Sensor Data
Each pixel converts incoming photons into electrical data that the camera uses to build an image. Your photo looks cleaner when enough photons reach each sensor site to describe brightness and color with confidence.
Digital image noise appears once the signal becomes thin. A dark restaurant, dim gym, or street lit by one sodium lamp gives your sensor less useful information than a sunny sidewalk. Your camera then starts with a rougher record.
That distinction changes your approach. A low ISO sensitivity setting alone does not solve a weak capture. Your goal is to gather enough real light because editing software cannot rebuild fine detail that never reached the sensor.
More light at capture preserves texture, color, and shadow detail. Heavy cleanup later can soften speckles, yet it cannot restore the original light signal.
Digital Noise Has a Distinct Appearance
Rough brightness variation is one familiar symptom. Smooth areas, such as a blue wall or gray suit, start to look gritty instead of even. Fine hair, eyelashes, and fabric weave lose separation as the camera struggles with small tonal changes.
Colored speckles are another clue. Red, green, blue, or purple dots may appear in a black jacket, night sky, or shadow beneath a table. Those colored errors point toward weak color data rather than intentional texture.
Film grain comes from a separate process. Traditional film uses light-sensitive silver-halide crystals, and higher-speed film carries larger or more visible grain than slower stock. Your digital camera has no crystals, so its roughness comes from electronics, limited light, processing, or heat.
Your next step is diagnosis. Broad grit needs a different response than fixed bright dots, blocky JPEG patches, or pale outlines beside sharp edges.
Visible Patterns Point to Different Sources
Luminance and Color Defects Need Different Edits
A close view at 100 percent shows whether the damage is tonal or chromatic. Luminance noise resembles black-and-white grit across smooth tones. Color noise looks louder because red, green, blue, and purple flecks interrupt skin tones and neutral shadows.
Your editing order matters here. Remove color speckles before working on luminance texture, since color cleanup can calm a file without flattening every subtle surface detail.
| Visible defect | What you see | Likely source | Useful response |
|---|---|---|---|
| Luminance noise | Monochrome grit in smooth tones | Weak light signal or brightness lifting | Apply restrained detail-preserving cleanup |
| Color noise | Red, green, blue, or purple flecks | Weak color data and sensor read noise | Calm color speckles before tonal grit |
| Hot pixels | Fixed bright dots in identical locations | Heat during long exposure capture | Use dark-frame cleanup or pixel mapping |
| JPEG artifacts | Blocks, ringing, or smeared edges | Heavy compression after capture | Export a larger, higher-quality file |
| Sharpening halos | Pale or dark outlines near edges | Excessive edge sharpening | Lower sharpening amount and radius |
Hot Pixels Stay Fixed While Broad Noise Moves
A hot pixel is a tiny sensor site that reports too much brightness during a long exposure. In a 30-second night photo, it may appear as a white, red, or blue pinpoint. Unlike broad image noise, it stays in the same location from frame to frame.
Heat makes this pattern more visible. Your sensor warms during a multi-minute exposure, and certain sites can produce abnormal output. Long-exposure noise reduction records a dark frame and subtracts fixed hot-pixel patterns from your image.
JPEG compression causes different damage. Compression divides areas into small blocks and discards fine data to shrink the file. Your photo may show square patches in a dark sky or ringing beside a high-contrast roofline.
Oversharpening adds another false alarm. A bright halo along a face, branch, or building edge is not sensor grain. Lower sharpening before cleanup so artificial outlines do not become more obvious.
Separating processing artifacts from true noise matters because only the latter begins with too little captured light.
Low Light Limits the Signal Available to Your Camera
Photon Counts Set the Starting Quality
Photon arrival has random variation. A sensor site receiving 10,000 photons records a steadier average than one receiving 100. This physical variation is called shot noise, and it exists before your editing software opens the file.
The signal-to-noise ratio improves as photon count rises. More captured light gives your camera a stronger signal relative to random variation. That is why a window-lit portrait at 1/125 second can look cleaner than a dim-room portrait at the same framing.
Your shadows start with less data than highlights. A bright lampshade may hold thousands of useful tonal levels while the far corner of the room holds a thin trace. Brightening that corner later stretches uncertainty along with detail.
Subject Movement Sets Exposure Limits
Dim interiors force three competing choices: open the aperture, lengthen shutter speed, or raise ISO sensitivity. Each choice changes a separate part of the image, so your subject decides which compromise causes the least damage.
- Indoor portraits: Open the aperture and move your subject toward a window before raising ISO sensitivity.
- Fast action: Hold a shutter speed that freezes motion, then accept a higher setting rather than blurred faces.
- Handheld night scenes: Brace your camera, use stabilization, and expose for useful bright tones without clipping them.
- Dark concerts: Protect facial exposure because lifting a dark face later produces harsh texture.
- Tripod landscapes: Keep ISO sensitivity low and extend exposure time while your camera remains motionless.
A runner under stadium lights needs a short exposure, while a bridge after sunset can stay still for several seconds. Your technique needs to follow the subject rather than a fixed rule about one setting.
Once movement sets your shutter-speed ceiling, ISO becomes the control that brings exposure back into range.
Motion blur and digital grit are separate failures. A clean but blurred face is not an improvement over a textured but sharp face.
ISO Sensitivity Amplifies a Limited Signal
The Camera Raises Signal and Noise Together
The ISO sensitivity control changes how strongly your camera amplifies what the sensor captured. It does not send extra photons through the lens. A higher setting raises image brightness, yet it raises the weak signal and underlying electronic variation together.
Your camera still needs higher ISO sensitivity in demanding scenes. A basketball player indoors may need 1/500 second to keep hands and faces sharp. Raising ISO sensitivity makes that shutter speed possible, while a lower setting could leave your frame dark or blurred.
The short answer is no, not by itself. High ISO makes existing noise easier to see, but weak light and poor exposure are the deeper causes.
Accurate Exposure Can Beat a Lower Setting
A properly exposed frame at high ISO sensitivity can look cleaner than a dark frame shot at low ISO sensitivity and brightened two stops later. The brighter capture records more shadow data before conversion, while the dark capture forces your editor to magnify weak information.
Exposure latitude varies by camera sensor. Larger sensors can retain substantial shadow detail, yet no sensor turns an almost-black area into a clean midtone without a visible tradeoff. Your histogram reveals that cost before you leave the scene.
Manufacturers label sensitivity behavior through standards such as ISO 12232, but that number alone does not predict quality. Sensor design, read noise, RAW processing, and actual exposure shape the file in front of you.
Low-setting photos can still look rough. Underexposure is the usual explanation, especially after aggressive shadow recovery.
Underexposure Makes Shadow Noise More Visible
Brightness Lifting Enlarges Weak Data
A dark photo can look acceptable on the back screen because a bright display disguises how little data sits in the shadows. Raise exposure by two stops later, and weak areas expand into visible grit, color blotches, and smeared detail.
Your editor does not add light to the original capture. Adobe Lightroom, Adobe Photoshop, DxO PhotoLab, and Topaz Photo AI analyze patterns and suppress unwanted variation. They cannot identify every strand of hair or brick edge that the sensor barely recorded.
A common example involves a person standing before a bright window. Their face records two stops darker than the room, then the shadow slider rises to reveal facial detail. Cheeks can show color flecks, and hair can turn clumpy because the face started with too little signal.
| Capture choice | Editing result | Shadow appearance |
|---|---|---|
| Face exposed near midtone | Small adjustment needed | Fine texture remains visible |
| Face one stop too dark | Moderate lift required | Some luminance grit appears |
| Face two stops too dark | Heavy lift required | Color blotches and detail loss grow |
| Highlights clipped severely | Highlight detail cannot return | Clean shadows do not fix white areas |
The Histogram Shows Where Your Data Sits
The histogram maps tonal data from dark values on the left to bright values on the right. A pileup against the left edge warns that large areas received little exposure. Your camera’s highlight warning shows the opposite risk: clipped bright areas with no recoverable detail.
Expose for the subject that matters. At sunset, protect the bright sky only as far as your intended subject allows. A silhouette can stay dark by design, while a portrait needs enough exposure on the face to avoid heavy recovery.
RAW files give your edits more room than JPEG files because they retain more sensor data and avoid heavy in-camera compression. Your RAW file still has finite shadow information, so careful capture remains the stronger choice.
Those limits vary with the hardware and processing choices that shape how much usable image data survives.
Sensor Size, Heat, and File Processing Change the Result
Sensor Area Changes Photon Collection
Behind the lens, a larger sensor provides more light-gathering area for each exposure. Under equivalent framing and exposure, a larger sensor can collect more photons than a very small sensor. That larger photon count improves the starting signal and limits roughness in dark tones.
Pixel size matters too, though it is not the sole predictor. Small pixels can perform well through efficient sensor design and strong processing, yet tiny sites have less physical area for light. Your phone compensates with multi-frame capture, computational blending, and sharpening.
A compact camera, smartphone, and full-frame camera can all produce clean daylight files. The gap appears in a candlelit room, at high shutter speeds, or during deep shadow recovery, where photon collection becomes the limit.
Heat Adds a Separate Pattern During Long Exposures
Long exposures keep the sensor active for seconds or minutes. Electrical activity warms the chip, and warmer electronics produce more thermal variation. A five-minute astrophotography frame on a summer night can show more scattered speckles than a short daylight exposure.
Your camera’s long-exposure noise reduction can target fixed defects by taking a dark frame of equal length after the main exposure. A 60-second photograph may need another 60 seconds before the next shot. That delay matters during changing light or star-trail sequences.
Dark-frame subtraction targets repeatable heat-related patterns and hot pixels. Your exposure still needs enough real sky, landscape, or subject signal to hold up during editing.
File Choices Affect What You See
JPEG files apply sharpening, color changes, and compression inside the camera. Those choices can make grain look harsher, especially in dark blue skies or smooth skin. RAW files preserve more editing latitude, though they need careful processing before export.
Resizing can hide fine noise because several pixels blend into fewer output pixels. Excessive sharpening after a small export can bring rough texture back. Your final file should match its destination instead of carrying full-resolution defects into a tiny display image.
Online compression can add blocks and smears that resemble capture defects. Exporting a clean JPEG at required dimensions limits repeated resizing and protects subtle gradients in skies and walls.
A Capture Workflow Limits Noise Before the Shutter Fires
Light and Exposure Choices Come Before ISO Gain
A useful sequence starts at the scene instead of the camera menu. Move closer to a window, shift toward a brighter wall, turn on a lamp, or change your angle so available light falls on your subject. Each adjustment gives your sensor more real data.
- Add available light: Move the subject, change position, or use a brighter practical source before altering camera settings.
- Open the aperture: Select a wider aperture where shallow depth of field suits your composition and focus needs.
- Slow the shutter: Choose the longest shutter speed your subject and handholding technique can tolerate without blur.
- Raise ISO sensitivity: Increase gain only enough to reach usable exposure after aperture and shutter choices.
- Check the histogram: Review shadow placement and clipped highlights before light or subject movement changes the scene.
Your exposure triangle links aperture, shutter speed, and ISO sensitivity. Aperture changes depth of field, shutter speed changes motion rendering, and ISO sensitivity changes amplification. You choose the least harmful trade for the photograph in front of you.
Four Common Scenes Need Different Choices
For an indoor portrait, place your subject about three feet from a large window and turn their face toward it. An aperture such as f/2 or f/2.8 gathers more light, while a shutter speed near 1/125 second limits hand and facial movement.
Moving subjects need shutter speed priority. A child running through a living room may need 1/500 second, even though that forces higher ISO sensitivity. A sharp frame with modest texture holds more useful information than a clean blur.
Handheld night scenes reward stability. Press your elbows against your body, lean against a wall, and use optical or sensor stabilization where available. Your shutter speed can drop farther before hand movement spoils the frame.
Tripod-mounted long exposures remove camera shake from the equation. Use a low ISO sensitivity setting, delayed shutter release, and stable tripod. Your remaining concerns become subject movement, heat, and bright highlights.
Smartphone Cameras Need a Separate Approach
Night mode blends several frames, so it works best with a still subject and steady phone. A moving face can turn soft or fragmented because the frames do not align perfectly. Brace your phone against a railing or solid surface before pressing the shutter.
- Clean the lens: Remove fingerprints that scatter light and turn bright lamps into hazy blobs.
- Avoid digital zoom: Crop later from the main camera rather than enlarging weak detail during capture.
- Tap the subject: Set exposure and focus on the face, sign, or object that needs clean detail.
- Hold still briefly: Keep your phone stable until multi-frame capture finishes its sequence.
- Use nearby light: Step under a storefront awning or near a lamp rather than shooting from the darkest corner.
These choices limit image noise before software enters the process. Your cleaner starting file gives editing tools less damage to hide and more detail to preserve.
Careful Editing Preserves Detail While Calming Noise
Correct Color and Exposure Before Cleanup
Start with white balance and overall exposure. A badly shifted color temperature can exaggerate blue or purple flecks in shadows, while aggressive brightness lifting reveals grain that better capture settings would have avoided. Your adjustments should bring the file near its intended brightness before cleanup begins.
Color noise reduction comes next. In Adobe Lightroom, the Color control targets random chromatic flecks without removing every small luminance transition. Push it too far, and delicate variation in skin, fabric, or dusk skies loses life.
Luminance cleanup needs restraint. Raise it until rough patches settle, then stop before eyelashes, knitwear, leaves, or hair merge into waxy shapes. Your goal is a believable photograph rather than a plastic surface.
Inspect at 100 percent, then inspect again at your final output size. A file that looks rough under extreme magnification can look natural in a normal print or screen display.
Mask Smooth Areas More Than Detailed Areas
A clear sky can tolerate stronger cleanup than an eye. Smooth shadows beneath a building can take more than tree branches, denim, or curls. Selective masking lets software target distraction without softening the details that give your image character.
Adobe Lightroom includes masks for a subject, background, sky, or brush-painted area. DxO PhotoLab uses DeepPRIME processing for RAW files, while Topaz Photo AI includes automated detail and noise controls. Your judgment decides whether the result still looks natural.
A portrait edit might place stronger cleanup on a gray backdrop, moderate cleanup on dark clothing, and minimal cleanup around eyes and hair. That local approach preserves the cues that keep a face focused instead of airbrushed.
Texture Is Not Always Damage
Some photographs benefit from visible roughness. Street scenes at night, black-and-white work, and images that echo film can carry modest grain without looking damaged. Your choice should suit the mood and subject rather than chase sterile smoothness.
Export size matters at the finish. Downsize carefully, avoid repeated JPEG saves, and retain enough quality to protect gradients. A noisy full-resolution file may look balanced at 2400 pixels wide, while heavy compression adds fresh blocks around dark edges.
Noise reduction softens unwanted variation, but it cannot restore missing fine detail. Your strongest result starts with enough light, intentional exposure, and edits that protect what your camera recorded.
Final Takeaways
The cleanest path starts with more useful light, accurate exposure on the subject, and a higher ISO sensitivity setting only when shutter speed or depth of field demands it. Your editing should calm remaining defects without sanding away faces, fabric, foliage, or the natural texture that makes a photograph feel real.
FAQ
What causes noise or grain in photos?
Weak light is the main cause of digital noise because your camera sensor receives fewer photons and records a less stable signal. Higher ISO sensitivity settings, underexposure, shadow lifting, heat during long exposures, small sensors, and JPEG compression can make roughness more visible.
Why are my photos grainy even at a low ISO sensitivity setting?
A low ISO sensitivity setting does not protect an underexposed photo. Your shadows may contain too little recorded data, and raising brightness during editing expands that weak signal into visible grit, color speckles, and blotchy tones.
Does a high ISO always cause image noise?
No. A correctly exposed high-ISO frame can look cleaner than a low-ISO frame captured too dark and brightened later. Your camera amplifies the captured signal at higher settings, so exposure matters more than the ISO number alone.
Why do low-light photos look grainy?
At ISO 6400, the sensor receives fewer photons, leaving visible grain throughout the frame. The camera then records a weaker signal, and higher ISO sensitivity or editing adjustments make random brightness and color variation easier to see.
Why are smartphone photos noisier than camera photos?
Smartphones have very small camera sensors and small light-gathering sites. Your phone offsets that limit through multi-frame capture and processing, yet dark scenes, moving subjects, and heavy shadow lifting still reveal rough texture sooner than larger cameras.
Can underexposure make a photo grainy?
Yes. Underexposure leaves shadows with limited sensor data. Raising exposure or shadows later brightens that weak information along with random variation, which creates visible grit, colored flecks, and soft detail.