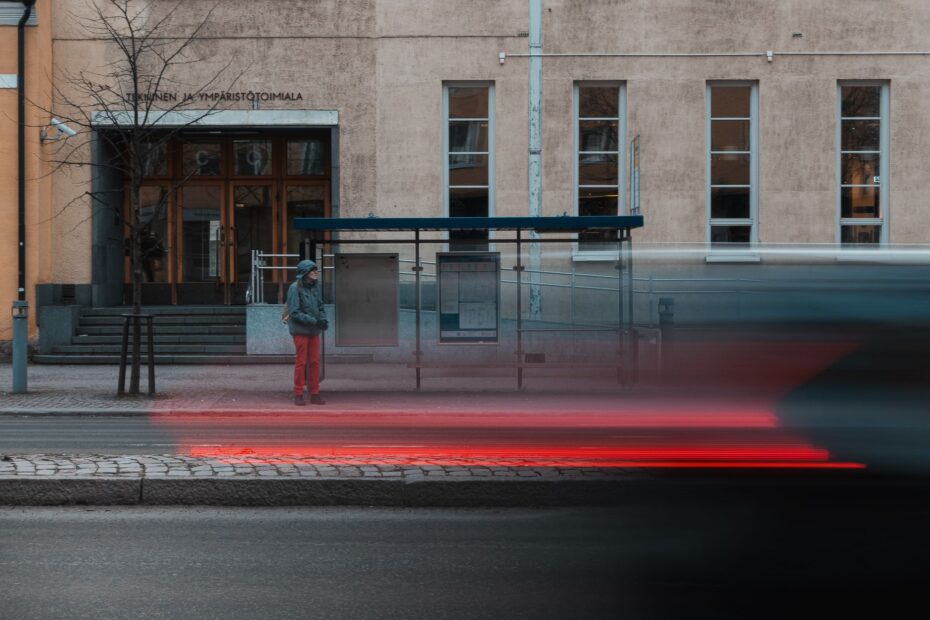
A runner, a trembling hand, or both can leave movement recorded while the shutter remains open. A child’s face can stay sharp at 1/500 s and become a soft streak at 1/30, even though autofocus locked correctly.
You’ll learn how exposure time, focus, focal length, light, and camera stability shape sharpness in family photos, travel scenes, sports frames, and creative long exposures.
Motion Blur Records Movement During Exposure
A camera records light across a span of time rather than capturing a frozen instant. Anything that shifts far enough across the sensor during that span leaves a visible trail. Your shutter speed sets the length of that recording window.
Motion blur is not always a flaw. A cyclist with a streaked background can suggest speed, while waterfall mist can look smooth during a long exposure. Your intent decides whether the blur adds energy or hides detail that needs to stay sharp.
Blur Direction Reveals Its Source
Directional streaks act like a map of movement. Hair, hands, wheels, and passing lights can stretch sideways, while a tilted camera can pull the entire scene diagonally. That direction gives you a practical clue before you change a setting.
Missed focus looks different. An out-of-focus edge fades without a clear travel path, much like a view through a fogged window. Your lens can focus correctly and still record blur because the subject moved during the exposure.
The causes of motion blur in photography become easier to control after you separate sharpness into two jobs: put focus on the intended subject, then keep the camera and subject still enough for the chosen exposure time.
Visible Blur Patterns Separate Motion, Shake, and Focus Errors
A brick wall behind a running dog gives you a quick diagnosis. Sharp bricks with a smeared dog point to subject movement, while blurred bricks and blurred fur point to camera shake. Your image holds the evidence before any menu setting enters the picture.
| Visible pattern | Likely cause | Useful correction |
|---|---|---|
| Background stays sharp while a moving subject streaks | Subject movement during exposure | Raise shutter speed for moving subjects |
| Entire frame smears in one direction | Camera shake | Brace your camera, use stabilization, or add a tripod |
| Edges look soft without directional trails | Missed focus | Move the focus area or improve autofocus tracking |
| Sharp detail sits behind or ahead of the subject | Focus landed on another plane | Select a smaller focus area and place it with care |
Subject Movement Leaves Static Detail Sharp
A waving hand at 1/60 s can blur while a shirt and wall behind it stay crisp. Your camera stayed still, but the hand traveled across the frame during the exposure. A faster shutter speed is the direct correction.
Cross-frame action needs more speed than movement toward your lens. A runner moving left to right crosses more pixels than a runner heading straight toward you. Tight framing also makes the same physical movement appear larger in your final photo.
Camera Shake Reaches the Entire Frame
Handheld blur reaches stationary objects because the camera changed position. Long lenses make that movement easier to see because a tiny hand tremor shifts a narrow angle of view. Your 200mm frame shows more shake than your 24mm frame.
Continuous autofocus, subject tracking, and burst shooting improve focus consistency during action. But those tools cannot freeze a soccer ball at 1/40 s. Your focus system tracks position; shutter speed controls how far the ball travels during exposure.
Shutter Speed Sets the Amount of Recorded Movement
At 1/1000 s, a fast tennis swing can occupy nearly the same pixels from shutter opening through shutter closing. At 1/30 s, the racket can travel far enough to become a pale arc. Your exposure time is the main control behind visible motion trails.
Short Exposures Hold More Detail
Fast shutter settings reduce recorded travel by shrinking the available time for movement. A quiet outdoor portrait can look sharp at 1/125 s, while a jumping dog can need 1/1000 s or faster. Your subject’s speed sets the real target.
Distance changes that target. A distant vehicle fills less of your frame, so it can look sharp at a slower setting than a vehicle filling the frame from curbside. Large prints and tight crops reveal flaws that look harmless on a camera screen.
Exposure Requires a Trade-Off
Closing the shutter sooner admits less light. To hold the same brightness, open the aperture, raise ISO, or add light. Your choice changes depth of field, image noise, and the look of the scene.
Choose shutter speed for the movement you need to control before adjusting ISO. A bright image with a smeared face rarely becomes useful through editing.
No camera-wide switch removes accidental blur. Auto mode can select a slow exposure in dim light, so set a faster shutter speed through Shutter Priority, Manual, or an equivalent mode. Your camera needs enough light to hold that faster setting.
Focal Length and Distance Raise Handheld Stability Needs
The same hand movement that barely affects a 24mm scene can ruin a 300mm bird photo. Longer focal lengths magnify distant subjects and your camera’s tiny rotations. Your shutter setting needs to rise as the angle of view narrows.
The Reciprocal Rule Offers a Starting Point
For a static handheld subject, begin near one over the effective focal length. A 50mm lens suggests about 1/50 s, while a 200mm lens suggests about 1/200 s. Your camera’s crop factor changes effective focal length, so an APS-C body needs that adjustment.
Modern high-resolution sensors reveal small errors that lower-resolution files could hide. Close framing also amplifies shake, even with a short lens. Your safer choice is one or two shutter steps faster than the reciprocal rule where fine detail matters.
Image Stabilization Limits Camera Movement
Gyro-controlled lens elements and sensor shifts can counteract the small hand tremors that soften images. A Canon EOS R6 Mark II, Canon EOS R8, or Canon EOS R7 can offer stabilization options based on the lens and body combination. Your subject still needs a fast enough exposure.
- Use a firm grip. Hold the camera with both hands and keep your elbows close to your ribs.
- Brace against structure. Press against a wall, railing, tree, or door frame for a steadier shooting position.
- Control the release. Squeeze the shutter button instead of striking it with one finger.
- Use a tripod. Lock the camera down for static scenes, night city views, and long exposures.
- Delay the exposure. Use a two-second timer, remote release, or shutter-delay mode to avoid touching the camera.
A tripod solves camera shake, not a moving person in front of it. In a night street scene, buildings can stay sharp while passing headlights stretch into lines. Your shutter duration still records moving elements.
Shutter-Speed Ranges Give Action a Practical Starting Point
Starting with a sensible shutter speed saves more frames than trying to repair a slow exposure later. The ranges below assume handheld shooting and normal viewing sizes. Your lens length, subject distance, and intended look can push the setting higher.
| Scene | Starting shutter speed | What the setting controls |
|---|---|---|
| Static handheld scene | 1/125 to 1/250 s | Camera shake at normal focal lengths |
| Walking person | 1/250 to 1/500 s | Arms, feet, and head turns |
| Active child or pet | 1/500 to 1/1000 s | Sudden direction changes |
| Casual sports | 1/1000 to 1/1600 s | Body movement and ball movement |
| Fast sports | 1/2000 to 1/4000 s | Fast limbs, equipment, and impacts |
| Passing vehicles | 1/1000 to 1/2000 s | Wheel rotation and side-to-side travel |
These values are starting points rather than fixed rules. A dog racing across your frame at close range needs more speed than a dog moving away in the distance. Your camera screen cannot reveal every flaw at full image size.
Zoom into eyes, lettering, fur, or another detail that carries the photo. Raise shutter speed in one-step increments until that detail stays defined. Your motion blur photography settings become more reliable through that direct comparison.
When available light cannot support that faster setting, exposure compromises begin to shape sharpness.
Low Light Pushes Exposure Toward Blur
In a dim room, limited light often forces the camera toward a longer exposure. At a birthday dinner, 1/20 s can blur a hand gesture, a laughing face, or the whole frame from your own movement. Your camera is chasing brightness rather than motion control.
Aperture, ISO, and Light Change the Result
Begin with the aperture. A wider opening, such as f/1.8 instead of f/4, admits more light but narrows depth of field. Your focus placement becomes more demanding because a face can look sharp while nearby ears fall soft.
Raise ISO until noise reaches a level that suits your intended output. A slightly grainy photo at ISO 3200 is more usable than a clean ISO 400 file blurred at 1/30 s. Your subject detail has to exist before noise reduction has anything to preserve.
- Open the aperture. Use a wider lens opening where shallow depth of field suits your scene.
- Raise ISO sensitivity. Trade some noise for a shutter speed that holds your subject still.
- Add more light. Move near a window, turn on lamps, or use flash where it suits the scene.
- Stabilize static scenes. Use a tripod or solid surface after your subject has stopped moving.
- Review at magnification. Check faces and fine edges rather than trusting a small preview.
Phones Follow the Same Exposure Physics
An iPhone or another smartphone uses a small sensor, strong processing, and automatic exposure choices to brighten dark scenes. Night mode can merge several frames, so a moving child can appear doubled or smeared while furniture stays sharp. Your phone cannot merge subject positions that do not match.
Add light where possible, brace the phone against a solid surface, and use a tripod for still scenes. Pro or manual modes on some phones allow a faster shutter selection, though that setting needs more light or a higher ISO. Your hands matter even more with a thin, light device.
A Diagnosis-First Workflow Stops Repeated Blurry Photos
Editing the wrong problem wastes time. Inspect an edge that should be sharp at 100 percent magnification, such as an eye, sign, branch, or building line. Your next adjustment should match the visible pattern rather than a guess.
Match Each Correction to the Evidence
- Check stationary detail. Blurred walls, furniture, or horizon lines point toward camera shake and a need for steadier camera handling.
- Inspect moving detail. Sharp surroundings with smeared limbs or wheels point toward subject movement and a faster shutter.
- Find the sharp plane. A sharp background with a soft face points toward missed focus rather than exposure-time blur.
- Review shutter data. Compare the recorded shutter speed with your subject’s movement and focal length.
- Change one variable. Raise shutter speed or revise focus settings, then shoot another frame under similar light.
- Inspect the retake. Check your target detail at high magnification before leaving the location.
Autofocus tracking helps with a moving face, bird, or athlete, while burst shooting gives your camera several chances to catch a clean posture. Neither feature repairs a shutter setting that records too much travel. Your selected exposure still sets the limit.
Editing Software Has Clear Limits
Adobe Photoshop and similar editors can raise local contrast, sharpen edge transitions, and reduce the appearance of mild softness. They cannot reliably rebuild fine detail erased into a long smear. Your strongest recovery for meaningful motion blur is a retake with corrected exposure settings.
Rolling shutter adds a separate complication with electronic shutters. Fast movement or rapid camera panning can bend vertical lines, such as a baseball bat or passing train car. Your mechanical shutter or faster electronic readout can reduce that distortion, but it is separate from ordinary blur.
Once accidental blur is identified and corrected, the same visual cues can be used deliberately.
Controlled Blur Becomes a Creative Choice
A blurred waterfall can suggest passing time, and light trails can turn traffic into glowing ribbons. Intentional motion blur photography works because you choose what stays sharp and what moves. Your composition needs an anchor, such as a building, face, or subject edge.
Panning Keeps the Moving Subject More Defined
Follow a moving cyclist with your camera at the same speed and direction during exposure. The cyclist can remain relatively sharp while trees and pavement streak behind them. Your panning technique works best with smooth follow-through rather than a sudden stop at shutter release.
Start around 1/60 to 1/125 s for a bicycle or car moving across your frame. Use continuous autofocus and shoot a short burst through the pass. Your hit rate rises because body position and camera movement rarely match perfectly in a single frame.
Long Exposures Need Stable Camera Placement
Water, traffic, clouds, and crowds respond well to shutter times from one-half s to several s. A tripod keeps buildings and terrain stable while moving parts blur. Your camera must not shift during exposure, even slightly.
Bright daylight can overexpose a long shutter setting, even at low ISO and a small aperture. A neutral density filter reduces incoming light without changing color much, allowing a longer exposure. Your filter strength depends on how much exposure time you need to add.
Decide before shooting whether your subject needs crisp detail or expressive movement. Mixing both goals without a clear anchor produces blur that looks accidental.
Creative attempts need repetition. A 1/15 s pan can leave too much streaking, while 1/125 s can look nearly frozen. Your review should judge the sharp anchor and blur direction, not only the brightness of the frame.
Final Thoughts on Sharpness and Motion
Motion blur comes from recorded movement, not a mysterious camera flaw. Your sharpest fix is to identify whether the subject moved, the camera moved, or focus missed, then set shutter speed and camera stability around that cause. Once you control the causes of motion blur in photography, slow exposures become a deliberate visual choice rather than an unwanted surprise.
FAQ
What is motion blur and why is it bad?
During an exposure, movement can turn edges into directional smears that make subjects look soft or indistinct. It is unwanted when it hides a face, eye, product detail, or another detail you need sharp, but it can add speed and atmosphere when you choose it deliberately.
How do I fix motion blur in photos?
For a new photo, use a faster shutter speed for subject movement or stabilize your camera for shake. Editing tools can improve slight softness through contrast and sharpening, but your original detail cannot be fully restored after a long exposure has smeared it.
How do I turn off motion blur?
You do not turn it off with one universal switch. Set a faster shutter speed, raise ISO or open the aperture to maintain brightness, and stabilize your camera for static scenes. Your camera mode must allow you to control or influence exposure time.
What are the best settings for capturing motion blur in photography?
For panning, begin around 1/60 to 1/125 s and move your camera smoothly with the subject. For water or traffic trails, use one-half s to several s with a tripod, low ISO, and a neutral density filter in bright conditions.
How can I tell whether a photo is blurry from motion or missed focus?
Motion blur leaves a directional trail, while missed focus creates soft edges without a clear travel direction. Check static details around your subject: whole-frame blur suggests camera shake, while a sharp background and a soft subject can reveal either missed focus or subject movement.