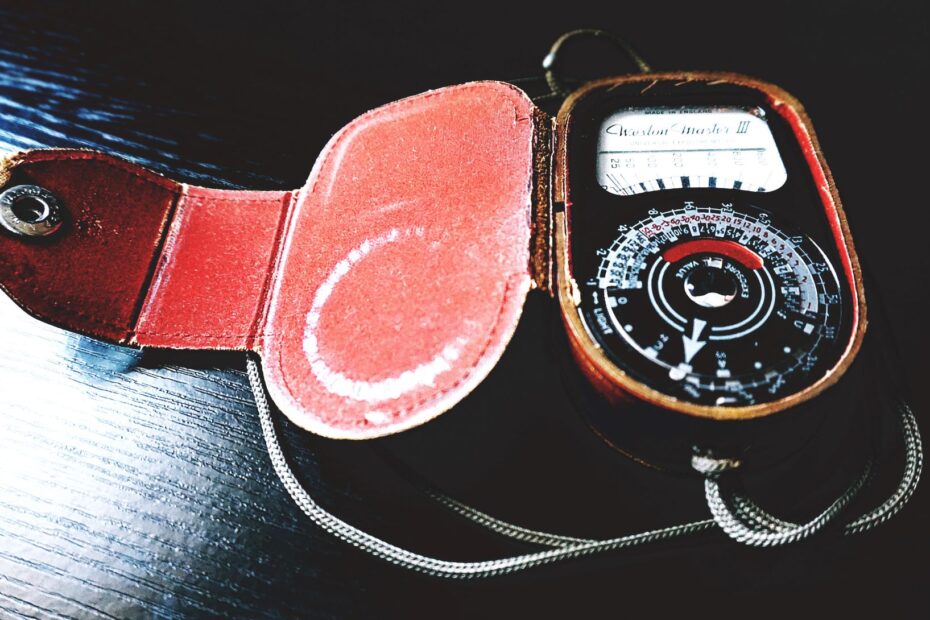
A 1–5% sample, a central bias, or a full-frame analysis determines how a reflected-light meter selects scene brightness for exposure. Spot reads a small target, center-weighted favors the middle, and matrix reads multiple zones. Your aperture, shutter speed, and ISO still form exposure, but the sampled area can leave a face near a bright window dark or natural.
You can use these patterns for portraits, wildlife, concerts, snow, and backlit subjects while accounting for Canon, Nikon, Fujifilm, and Sony labels.
Camera Meters Aim for Middle-Tone Reflected Light
A camera meter reads light bouncing from a scene rather than recognizing the scene itself. It tries to place the sampled area near medium brightness, close to a gray tone. Your white snowfield and black jacket can both mislead that reading because neither subject appears medium gray in real life.
Metering mode changes the exposure recommendation, not the exposure triangle. Aperture controls depth of field, shutter speed controls motion blur, and ISO affects sensor amplification. Your selected pattern tells the camera which reflected-light information carries the strongest influence before it sets or suggests those values.
Bright skies, pale sand, dark walls, and black clothing create exposure errors because the meter has no knowledge of an object’s intended color. A white bird can turn gray. A tuxedo can turn washed out. Your correction starts with identifying the part of the frame that influenced the reading.
That gray-target behavior explains why a meter can be accurate and still deliver the wrong visual result. You are deciding whether snow should remain bright, dark fur should remain dark, or a face should hold detail against a bright background. Exposure compensation changes the meter’s starting assumption after that decision.
That baseline also depends on which parts of the frame the camera is designed to value most.
The Three Patterns Assign Different Priorities
The same sunset can produce three exposure suggestions without moving the camera. Spot reads a tiny target, center-weighted gives extra influence to the middle, and matrix studies zones across the frame. Your selection changes what the meter treats as the strongest evidence in the scene.
| Mode | Area sampled and priority | Strong fit | Risk and correction |
|---|---|---|---|
| Spot | Small area near the active point or frame center | Backlit face, distant animal, isolated performer | Wrong target creates a large error. Meter a known tone and add exposure compensation where needed. |
| Center-weighted | Broad frame reading with added center influence | Centered portraits and repeatable compositions | Bright center objects can pull exposure. Reframe or lock exposure. |
| Matrix or Evaluative | Multiple zones interpreted through camera software | Travel, street scenes, and balanced landscapes | Strong contrast can darken the subject. Check the histogram and compensate. |
The difference between spot and center-weighted metering comes down to how much surrounding light stays in the calculation. Spot treats the chosen patch as the main authority. Center-weighted still reads much of the frame, so a bright window or dark background keeps some influence over your exposure.
Matrix metering divides the image area into separate zones and forms an overall judgment from those zones. Your camera can also factor in focus distance, the active autofocus point, color, or face detection. That broad reading suits ordinary light, yet it cannot know which bright or dark detail matters most in your composition.
For photographers asking what is matrix metering, it is a multi-zone system that weighs a broad scene rather than a single point. Matrix metering vs spot metering is a choice between fast frame-wide judgment and direct control over a small subject tone. Your scene contrast decides which approach gives you a cleaner starting exposure.
Spot Metering Gives a Small Target Exposure Priority
A singer under one white stage light gives spot metering a clear job. The dark theater fills most of the frame, yet your meter can read the lit face rather than the black background. That control helps in high-contrast scenes where the subject occupies a small part of the image.
A Small Target Needs a Deliberate Tone
Spot coverage varies by camera, though it is far smaller than center-weighted coverage. Nikon bodies can link the spot area to a selected focus point on certain models, while other cameras keep it near the center. Check your camera manual before assuming that the focus point and meter point move together.
Meter a face, green grass, or weathered gray pavement with little compensation because those tones sit near the meter’s middle target. A bright face in direct sun needs positive exposure compensation after you meter it. Your white egret can need roughly +1 to +2 stops, depending on feather detail and the light.
Metering directly from a bright subject does not tell the camera to keep it bright. It tells the camera to darken that subject toward medium gray unless you add exposure compensation.
Skin tone needs care in spot mode because skin brightness changes with light direction and complexion. A face in open shade gives a different reading from the same face under hard noon sun. Your histogram shows whether bright skin has lost detail at the right edge.
Spot Metering Ignores Most Surrounding Light
Place the spot on a deer across a sunlit field and the meter can favor the animal instead of the grass, sky, and shadows. Your background can clip bright or fall dark, but the animal’s coat receives exposure priority. That is the trade your selected pattern makes.
Center-weighted metering vs spot metering becomes clear in that wildlife scene. A center-weighted reading still absorbs much of the field and sky, softening the animal’s influence. Spot gives you stronger subject control, but careless placement produces a sharper exposure error than a broad pattern.
A bird against water needs the same discipline. Metering its pale feathers can protect feather texture, while metering blue water can leave the bird too bright. Your meter point matters more than the camera brand in that moment.
Center-Weighted Metering Suits Stable Central Framing
A formal portrait near the middle gives this older pattern a comfortable job. Light from the full frame still counts, yet the center has more pull. Your result stays predictable without relying as heavily on scene-recognition software.
The Center Receives Added Influence
Center-weighted metering suits studio portraits, team photos, and static architecture where your framing repeats from shot to shot. A darker edge does not dominate the reading as easily as it would with an equal full-frame average. That consistency can feel steadier than matrix behavior against changing backgrounds.
Unlike spot, this pattern leaves room for light around your subject. The result can look more natural for a centered person against a moderately bright wall because background brightness still contributes. Your exposure stays less dependent on a tiny patch of skin or fabric.
A centered bride in a white dress offers a useful example. Spot metering from the dress can darken fabric toward gray without positive compensation. Center-weighted metering leaves more room for the darker surroundings, giving you a less extreme starting point.
Off-Center Subjects Reveal Its Weak Point
Move a portrait subject to the far left and a bright object near the center can take over. A white shirt, window, or reflected tabletop can pull exposure away from the face. Your composition, not autofocus alone, changes how this mode behaves.
- Centered headshots: Keep the face near the middle for a steady reading across several poses.
- Formal groups: Choose this pattern where the group fills the central portion of the frame.
- Locked tripod views: Favor it for repeated framing where lighting shifts little between frames.
- Off-center portraits: Meter, lock exposure with AE lock, then recompose before releasing the shutter.
That limitation leads naturally to a broader pattern for moving scenes. You can switch to matrix or evaluative metering where subjects cross the frame, light shifts between shade and sun, or your framing changes quickly.
Matrix and Evaluative Metering Read Broad Scenes
A street scene with storefront shade, pavement, faces, and sky asks the camera to weigh several tones at once. Matrix metering splits that view into zones, then calculates a single exposure from their pattern. Your camera is making an informed estimate rather than reading one simple average.
Brand Labels Describe Related Systems
Nikon calls its multi-zone pattern Matrix Metering. Canon calls its comparable broad pattern Evaluative Metering. Fujifilm uses Multi Metering on many bodies, while Sony labels a similar setting Multi. Each name describes frame-wide analysis, though software behavior differs by model.
Evaluative metering vs matrix metering is mainly a naming distinction between Canon and Nikon systems. Canon Evaluative Metering is a sensible starting point for your balanced scenes, especially with face detection active. Nikon Matrix Metering fills a similar everyday role, yet neither setting can protect a subject your camera misidentifies.
Face detection can shift the result in a useful direction, but it does not replace judgment. A face near a bright window can still need positive exposure compensation. Your histogram confirms whether the camera preserved highlights in skin, sky, and fabric.
Partial Metering Sits Between Broad and Spot Readings
Canon Partial Metering uses a smaller central area than Evaluative Metering, but it is not identical to true spot. That difference matters for your distant bird or tiny face in a bright landscape. Partial coverage can still include more background than you intended.
Multi-zone metering is fast for scenes with modest contrast, such as a shaded street with bright pavement and a pale sky. Strong backlight exposes the limits of any broad judgment. You can retain matrix mode and adjust exposure compensation, or shift to spot for direct subject control.
How to choose a camera metering mode comes down to subject size, subject placement, and contrast. A centered portrait suits center-weighted metering. A small hawk against bright sky suits spot, while a balanced travel scene suits a broad evaluative or matrix pattern.
Those straightforward matches become less reliable when extreme brightness differences force competing exposure priorities.
Difficult Light Shows the Limits of Each Pattern
A person standing before a bright sunset reveals the weakness of broad readings. Matrix and center-weighted patterns see a large amount of bright sky, then lower exposure until the face goes dark. Spot metering on the face can protect skin tone, provided your highlight detail is expendable or fits within sensor dynamic range.
Bright and Dark Subjects Pull Toward Gray
Snow and white sand turn dull because the meter tries to darken their brightness toward gray. Add positive exposure compensation, then inspect the histogram for highlight clipping. Your goal is a bright file with texture still visible in snow ridges, wedding fabric, or pale feathers.
Black fabric and dark fur pull in the opposite direction. The meter tries to brighten them, which can make shadows look milky. Reduce exposure compensation for a dark subject that should stay dark, while protecting a small highlight such as a shiny eye or metal buckle.
Dynamic range sets the hard limit in scenes with brilliant sky and deep shade. A single exposure cannot always hold cloud detail and foreground shadow detail. Your choice becomes artistic: protect the brighter area, open shadows later, or alter the scene’s lighting relationship.
Isolated Light Defeats Broad Averages
Concert lighting changes fast and leaves most of the frame near black. Metering a spotlighted performer with a wide pattern can produce blown skin or a face that shifts exposure between songs. Your spot reading, manual exposure setting, and histogram review give you steadier control.
Extreme-contrast landscapes present a different limit. Highlight-priority metering, available on some cameras, biases exposure toward bright detail. It is a separate option from spot, center-weighted, or matrix patterns, so check your camera menu before assuming it changes the metering area.
Once the pattern is chosen, identifying the critical tone turns a difficult reading into a repeatable decision.
Protect a highlight only when it carries the picture. A reflection on water can clip without harm, while a bride’s dress or a bird’s white head can need visible detail.
A Metering Workflow Starts With the Tone That Matters
A backlit face becomes manageable after you decide which tone must look right. Spot metering gives you a direct route from that tone to your exposure setting. Your camera stops chasing the bright background after you lock the reading.
- Choose subject tone: Aim the active meter area at skin, fur, foliage, or another area whose brightness you want rendered correctly.
- Read the meter: Set spot mode and watch the exposure scale or camera recommendation while holding the target in the metering area.
- Lock exposure: Press AE lock, or hold manual exposure values, so the reading stays fixed after you move the camera.
- Recompose the frame: Place the face or animal where your composition needs it without letting the background reset exposure.
- Review the histogram: Check bright and dark edges after the shot, then shift exposure compensation in small increments.
Use that sequence for a distant hawk against a bright sky or a child beside a window. AE lock separates exposure from composition, while autofocus can still follow your selected focus point. That separation is the practical strength of spot work.
Histogram review catches errors that your rear screen can hide in sunlight. Push exposure up for bright subjects metered as gray, pull it down for unusually dark subjects, and watch for clipped highlights. Your camera meter starts the decision; the captured file confirms it.
Exposure compensation works in aperture priority, shutter priority, and program modes. Manual exposure gives you direct control, yet the meter still serves as a reference. Your chosen mode changes the reading area, while compensation changes where that reading lands.
Scene Choices Make Metering Faster
Most daylight scenes do not need surgical control. Matrix or Evaluative Metering suits travel, street photography, and balanced landscapes because it reads faces, pavement, sky, and buildings across the frame. Your exposure compensation dial remains the faster correction for a small error.
A Practical Mode-Selection List
- Balanced travel scenes: Start with matrix or evaluative mode for mixed but moderate light across the frame.
- Centered portraits: Choose center-weighted mode where the subject stays near the middle and framing repeats.
- Backlit faces: Select spot mode on skin, lock exposure, then recompose around the bright background.
- Distant wildlife: Favor spot mode for a small animal against snow, water, or bright sky.
- Concert performers: Meter the lit face or costume, then review highlights after lighting changes.
- Wide landscapes: Select matrix for even light, then protect clouds with compensation or highlight-priority settings.
Spot is stronger for a defined subject tone in severe contrast, while matrix suits quick work across varied, balanced scenes. Your subject placement and brightness decide the pattern, not a universal ranking.
Spot vs center-weighted vs matrix metering becomes simple after you match the pattern to the scene. Start broad where light is balanced, move to center-weighted for central compositions, and reserve spot for a tone that must override the rest of the frame.
Final Exposure Choices Depend on the Scene
Your camera does not see a white bird, a black jacket, or the face that matters in your frame. It sees reflected brightness and tries to move its chosen area toward medium gray. Pick matrix for broad harmony, center-weighted for steady central framing, and spot for deliberate subject control.
AE lock, exposure compensation, and the histogram turn that starting reading into the exposure you intended. Your meter offers a calculation, not a final creative decision. The histogram and the visible detail in your subject show whether that calculation fits the image.
FAQ
What is the difference between spot metering and center-weighted metering?
Spot metering reads a very small target and gives surrounding light little influence. Center-weighted metering reads a much wider area while giving extra influence to the middle. Your choice depends on whether a single tone or a centered composition should control exposure.
Is spot metering better than matrix metering?
Spot metering suits your backlit face, distant animal, or performer under isolated light because it can favor a small target. Matrix metering suits everyday scenes with balanced light because it evaluates multiple zones across the frame. Your subject size and contrast decide the stronger starting point.
What metering mode suits a Canon camera for everyday photography?
Across a typical family outing, Canon Evaluative Metering reads zones throughout the frame and works with modern autofocus and face detection. Switch to Spot Metering for a small high-contrast target. Canon Partial Metering gives you a middle-sized central reading rather than true spot coverage.
What metering mode suits wildlife photography?
A small bird against bright snow, water, or sky often benefits from spot metering to keep its exposure accurate. Matrix metering fits scenes where the animal fills much of the frame and light is even. Your histogram helps confirm that pale feathers retain detail.
How do you use spot metering with AE lock and recomposition?
Place the spot area on your chosen subject tone, set or lock exposure with AE lock, then recompose before taking the photograph. Your background no longer changes the exposure after the lock. Add positive exposure compensation for bright subjects that need to stay bright.