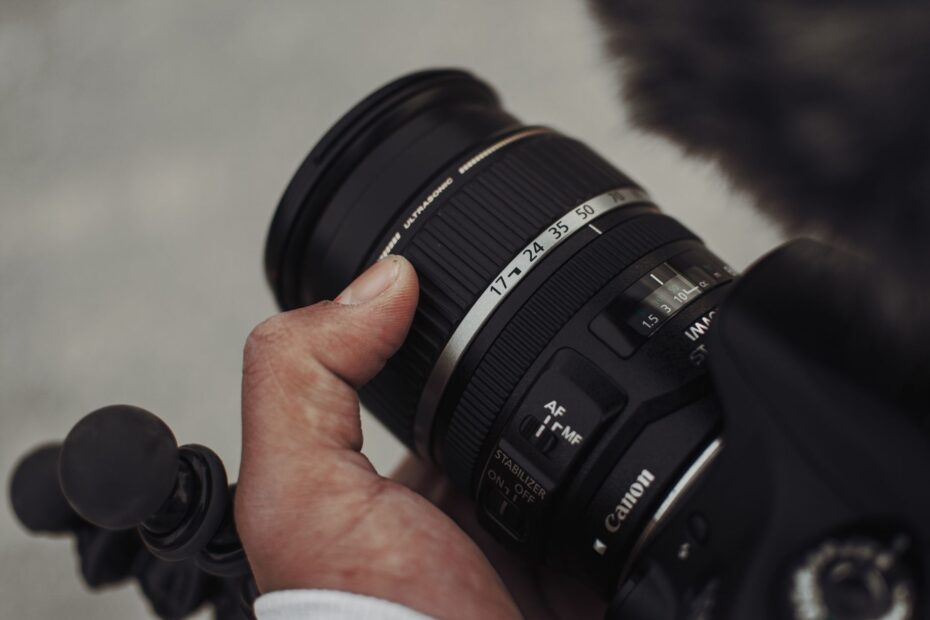
Milliseconds before exposure, real-time corrections counter tiny hand movements before they smear detail across the sensor. Your low-light photo can remain sharp at 1/15 second, yet a walking friend still blurs because stabilization steadies the camera rather than the subject.
This explanation covers OIS, IBIS, electronic video correction, long lenses, close-ups, tripod shooting, and the settings that shape your handheld results.
Camera Shake Is Only One Source of Blur
A sharp focus point cannot restore detail smeared during exposure. Image stabilization reduces blur caused by camera movement; it does not add detail, sharpen missed focus, or repair a soft image after capture.
Your hands never hold a camera completely still. Breathing, pressing the shutter button, and shifting your grip rotate the camera slightly. At 24mm, that movement covers fewer pixels than at 200mm, so a long focal length reveals camera shake far more clearly.
Camera motion leaves a distinct blur pattern
Camera-shake blur affects the full frame in one direction. Brick edges, eyelashes, and distant signs show a similar streak because the projected image drifted across the sensor while the shutter stayed open.
Subject motion blur looks different. Your camera can remain steady while a child swings an arm, a dog turns its head, or a car crosses the frame. Only the moving area smears, and stabilization cannot hold that subject still.
That difference changes your exposure choice. Stabilization can help you handhold a museum interior at 1/8 second with a static statue, but your child at that same shutter speed will still become a soft blur.
Stabilization solves camera movement. Choose a faster shutter speed, flash duration, or deliberate subject tracking to control movement inside the scene.
Handheld shooting exposes the biggest gains
Dim interiors create a clear need for stabilization because available light pushes shutter speeds downward. Your choices include a higher ISO, wider aperture, slower shutter speed, or external support. Stabilization expands the slow-shutter option for static scenes.
Close-up work adds a separate problem: small forward-and-back movement changes framing and focus distance. A flower photographed near minimum focus distance magnifies shake more than a distant landscape at the same focal length, so your sharp-frame rate can drop quickly.
Video exposes movement continuously rather than inside one still frame. Small jitters that barely register in a photograph become a nervous, floating image during a ten-second handheld clip. That visible movement leads directly to the control loop inside the camera.
A Real-Time Control Loop Counters Hand Movement
Motion sensors sample hand movement repeatedly during a still exposure or video clip. A gyroscope detects angular movement, a processor calculates an opposite correction, and tiny actuators move a lens group or sensor before drift reaches the recorded image.
Gyroscopes identify the direction of drift
Pitch is the up-and-down tilt created as your hands dip or rise. Yaw is side-to-side rotation, such as the small twist that appears as you press the shutter. These two angular movements account for a large share of handheld blur.
More advanced systems also address roll, which tips the horizon clockwise or counterclockwise. Five-axis sensor-shift stabilization adds horizontal and vertical translation. That extra correction matters in close-up photography, where camera position changes along with camera angle.
Your camera cannot predict future movement perfectly. It reads gyroscope sensors, estimates direction and speed, sends a correction command, reads the next sensor data, and adjusts again. The cycle acts like a tiny balance mechanism during capture.
Corrective movement keeps the image aligned
- Motion detection: Gyroscopes detect pitch, yaw, and, in some systems, roll or shift movement from your hands.
- Signal analysis: The camera processor calculates how far the image is drifting across your sensor plane.
- Opposite correction: Actuators shift a compensation lens group or move the sensor in the opposing direction.
- Continuous adjustment: Fresh gyroscope data updates correction throughout your exposure or video recording.
At 1/250 second, the system has little time to act, and shutter speed already blocks much visible shake. At 1/4 second, it has a longer window to counter movement, though a sudden bump or large framing change can exceed its correction range.
Video adds another complication. A smooth, slow pan is intentional movement, while a sharp twitch is not. The camera must separate those patterns, which explains why mode choice matters as much as the hardware.
Three Stabilization Systems Solve the Problem Differently
Correction can happen in the lens, at the sensor, or after the image reaches the processor. Each method stabilizes a different part of the capture chain, so each carries different strengths for your photos and footage.
OIS moves glass before light reaches the sensor
Optical image stabilization, or OIS, shifts a corrective lens group inside the lens or camera module. The moved glass redirects the light path so the image stays aligned on the sensor despite small camera rotations.
Canon calls lens stabilization IS, Nikon calls it Vibration Reduction, and Sony uses Optical SteadyShot on selected lenses. Tamron uses Vibration Compensation, or VC. The names differ, but each label describes lens-based stabilization.
It is a movable optical group controlled by motion data. Your viewfinder can appear steadier at long focal lengths because correction happens before light reaches the sensor and, on some cameras, the viewing path.
IBIS moves the sensor assembly
In-body image stabilization, or IBIS, suspends the sensor on a movable platform. The camera shifts that sensor to follow the projected image, allowing one body to stabilize many lenses, including older manual lenses without built-in correction.
Your manual lens needs accurate focal-length data for the body to calculate correction properly. Entering 50mm for a 50mm lens gives the system the angle-of-view data it needs. Entering 200mm makes it overreact and can harm the result.
Sensor-shift stabilization also enables five-axis correction in many mirrorless cameras. Sony, Nikon, Canon, Fujifilm, OM System, and Panasonic use versions of this approach, though axis coverage and coordinated lens behavior differ by model.
EIS trades frame width for steadier video
Digital image stabilization for video, also called EIS or DIS, analyzes each frame and repositions it electronically. The camera records extra image area around the edges, then crops into that area to counter visible shake.
Your field of view becomes narrower under an electronic crop. A 24mm lens can feel closer to 28mm or beyond, depending on the camera and mode. Strong modes can also stretch frame edges during fast movement, bending straight lines near the border.
| System | Correction method | Primary trade-off |
|---|---|---|
| OIS | Moves a lens group before light reaches your sensor | Needs a stabilized lens or module |
| IBIS | Moves your sensor to follow image drift | Long lenses can benefit more from lens-based correction |
| EIS | Crops and repositions video frames electronically | Reduces angle of view and can affect edge detail |
These approaches do not compete in every camera. Compatible lens and body pairs can share correction work, turning a simple either-or choice into a coordinated system.
Lens and Sensor Stabilization Can Work as a Team
A 400mm lens makes small rotations look huge in the viewfinder, while a 35mm lens makes them far less visible. That difference explains why lens-based stabilization remains valuable even on a body with IBIS.
Coordinated systems divide correction across axes
Compatible combinations can coordinate OIS and IBIS, assigning some movements to the lens and others to the sensor. The body and lens exchange data so they do not issue competing corrections.
Your exact behavior depends on the camera body, lens firmware, mount protocol, and shooting mode. A Canon RF lens on an EOS R6 Mark II can coordinate with the body system, while an adapted lens can rely on sensor shift alone or show reduced cooperation.
Lens stabilization helps your composition at 300mm or 600mm. A steadier viewfinder makes it easier to place an eye under an autofocus point, while IBIS has less visible effect through an optical DSLR finder.
Each system fits different practical needs
| Shooting situation | Lens stabilization | In-body stabilization |
|---|---|---|
| 200mm wildlife frame | Strong viewing and angular-correction benefits | Helpful, though body limits vary with focal length |
| Vintage 50mm manual lens | No correction without a stabilized lens design | Stabilizes your lens after focal-length entry |
| Handheld stills at 35mm | Useful on equipped lenses | Broad coverage across many lenses |
| Handheld video | Reduces optical shake before capture | Can pair with EIS for smoother movement |
Lens stabilization vs in-body stabilization has no universal victor. Your long telephoto work favors an optically stabilized lens, while compact primes and older glass favor IBIS. A coordinated lens-body pair gives your compatible setup the widest correction range.
That range still needs a usable shutter speed. Manufacturers express their claims in stops, a term that turns a technical rating into a choice at the exposure dial.
Stops Turn Stabilization Claims Into Shutter-Speed Choices
Each stop doubles or halves exposure. A five-stop stabilization claim means you could, under controlled conditions, handhold at a shutter speed 32 times slower than a baseline speed while retaining similar sharpness from camera movement.
Stops describe shutter-speed doublings
Start with a rough reciprocal guideline for full-frame photography: 1 divided by focal length. At 50mm, 1/50 second is a traditional handheld starting point; at 200mm, 1/200 second is the comparable baseline. High-resolution sensors and weak handholding demand faster speeds.
Your four-stop rating shifts 1/50 second to about 1/3 second: 1/50, 1/25, 1/13, 1/6, then roughly 1/3. This math describes camera-shake control only. It does not turn a moving face into a stationary subject.
| Lens view | Baseline handheld speed | Four-stop stabilized example | Moving-subject guidance |
|---|---|---|---|
| 24mm wide-angle | 1/25 second | About 1/2 second | Use 1/125 second or faster for casual walking |
| 50mm normal lens | 1/50 second | About 1/3 second | Use 1/250 second for active gestures |
| 200mm telephoto | 1/200 second | About 1/13 second | Use 1/1000 second for many moving animals |
Ratings depend on the scene and your technique
Published stabilization stops come from controlled procedures with a static target. Your result changes with focal length, shooting distance, grip, caffeine tremor, sensor resolution, and the axis of movement that occurs during capture.
A 45-megapixel sensor exposes tiny smear that a lower-resolution file can hide at screen size. Your pixel-level inspection can show a limit one or two stops above a brand claim, especially at 400mm or during close-up work.
Use the rating as a starting range rather than a promise. Raise shutter speed for any subject that breathes, walks, sways, flickers, or changes expression.
Video ratings need separate caution. A stills rating does not describe walking footage because your feet introduce larger vertical movement than the camera can correct. Mode selection shapes how that correction behaves.
The Right Mode Depends on the Shot You Intend to Make
A static building and a race car need opposite treatment. Normal stabilization corrects movement across several directions, while panning modes leave correction active only in the direction that protects your intended blur pattern.
Normal mode fits steady handheld capture
Use normal mode for a handheld portrait, a still interior, or static video from a standing position. Your camera corrects small pitch and yaw movement, helping fine detail remain intact without changing the appearance of intentional motion.
Active video modes layer stronger electronic correction over optical or sensor-shift stabilization. Your walking clip becomes steadier, but the crop narrows your view and can make wide-angle edge movement look elastic during quick turns.
For a slow spoken clip at 24mm, normal optical or sensor correction can look natural. For a short walking sequence, active mode can reduce bounce, yet a gimbal or a careful heel-to-toe walk still produces cleaner movement.
Panning mode preserves deliberate motion
Panning mode reduces correction along the direction of your sweep. Track a cyclist from left to right at 1/30 second, and the subject can remain sharper while the background becomes a horizontal streak.
Your lens may detect the pan automatically, or it may need a dedicated Mode 2 setting. Camera manuals use different names, so check the selected mode before an event rather than after an entire sequence shows uneven blur.
Tripods and intentional blur need restraint
- Stable tripod: Disable correction where your camera or lens lacks reliable tripod detection, since the system can hunt for movement that is absent.
- Intentional blur: Turn stabilization off for a deliberate camera sweep, light trail, or abstract shake exposure.
- Panning sequence: Select a panning mode rather than normal multi-axis correction for a controlled moving-background effect.
- Long exposure: Check your manual before exposures lasting several seconds because behavior differs among systems.
- Locked video rig: Disable active electronic correction on a solid tripod, slider, or locked support.
When to turn off image stabilization depends on your support and intent rather than a blanket rule. Your camera manual settles the tripod question for that model because some systems detect stable support and others can hunt.
Settings matter only after you verify that the system helps in your hands. A short repeatable check exposes weak technique, wrong focal-length data, and mode errors far faster than an impression from one frame.
A Simple Handheld Test Reveals Whether Stabilization Helps
A bookcase, brick wall, or printed package gives you the fine detail needed for a useful check. Choose a static subject, set a fixed focal length, and shoot several frames at each shutter speed so one accidental twitch does not define your result.
A repeatable sequence separates stabilization from luck
- Choose fine detail: Frame text, bark, brick, or a distant sign in even light with no moving elements.
- Lock the setup: Keep your focal length, focus point, aperture, ISO, and standing position unchanged throughout the sequence.
- Set baseline speeds: Shoot five frames each at 1/125, 1/60, 1/30, 1/15, and 1/8 second.
- Disable correction: Record the full series with stabilization off while using the same handholding technique.
- Enable correction: Repeat every shutter speed with your selected mode active and pause briefly before each frame.
- Inspect at full size: Compare matching detail areas at 100 percent and record the slowest speed producing consistent sharpness.
Your result should show a change in consistency rather than magical sharpness at every setting. At 1/125 second, both groups can look similar. At 1/15 second, stabilized frames should hold fine lines more reliably than unstabilized frames.
Common faults have practical causes
- Wrong mode: Normal mode can fight your deliberate pan, leaving a subject less crisp than expected.
- Missing focal data: Manual lenses need the correct focal length entered for sensor-shift correction to scale properly.
- Weak battery: Low power can limit camera functions or cause unusual behavior before a long shoot.
- Lens-body mismatch: Adapted lenses and outdated firmware can limit coordinated correction between body and lens.
- Slow subject speed: A stable camera cannot stop leaves, faces, pets, or traffic from moving during exposure.
- Focus variation: Autofocus movement between frames can resemble blur, so use a fixed focus point on your target.
Check the image at the same location each time, such as a letter edge near the center and a branch near the corner. Your corners can look softer from lens design or field curvature, neither of which signals a stabilization fault.
That test reveals a practical ceiling for your own grip and lenses. It also gives you better information than a single published rating while you decide how much stabilization matters for the work you do.
Stabilization Is a Capability to Match to Your Shooting
A fast shutter speed still outruns any correction system for a moving subject. Stabilization is not necessary for every photograph, but it has clear value for your handheld low-light work, long lenses, close-ups, and unrigged video.
Your shooting pattern should drive the choice
No. A studio photographer using flash at 1/200 second or a landscape photographer working from a tripod gains little during those moments, while a travel photographer inside dim buildings gains far more.
Your lens collection matters as much as your camera body. IBIS gives older primes and compact lenses camera-shake correction, while stabilized telephoto lenses give a steadier view and strong angular correction where your framing is narrow.
For video, inspect crop behavior, active modes, rolling-shutter artifacts, and system behavior during walking footage. A broad 20mm view can become visibly tighter under EIS, changing your framing before you record a clip.
A practical selection checklist keeps priorities clear
- Static low light: Seek strong stills correction for museums, interiors, evening streets, and quiet ceremonies.
- Long focal lengths: Favor coordinated lens and body correction where your work centers on 200mm or longer views.
- Manual lenses: Confirm that your body accepts focal-length entry for sensor-shift stabilization.
- Handheld video: Check electronic crop, active-mode behavior, and lens compatibility before relying on walking footage.
- Tripod work: Learn your camera’s tripod detection behavior before a long exposure or locked video setup.
- Moving subjects: Put shutter speed above stabilization claims because subject movement remains your limiting factor.
Learn your camera’s stabilization menu, check it at realistic shutter speeds, and choose a faster exposure whenever subject motion becomes the problem. That habit shows how image stabilization works in cameras more clearly than a number printed on a specification sheet.
What to Remember
Image stabilization is a moving correction system rather than a substitute for exposure judgment. Your strongest results come from matching OIS, IBIS, or EIS to the lens, support, shutter speed, and movement in front of you. Hold the camera steadily, select the right mode, and let stabilization handle the small motions that remain.
FAQ
How does camera image stabilization work?
Tiny gyroscopes detect camera movement during capture and trigger compensating corrections. A processor calculates the opposite correction and moves a lens group, sensor, or digital video crop to keep the image aligned. It reduces blur from hand movement, while a moving subject still needs a faster shutter speed.
Can image stabilization prevent motion blur?
A moving subject can still blur even when stabilization keeps the camera steady. Your camera can remain steady while a person walks, a pet shakes its head, or a vehicle passes through the frame. Use a faster shutter speed for moving subjects, then use stabilization to reduce the separate blur caused by your hand movement.
When should you turn image stabilization off?
During deliberate pans, certain long tripod exposures, and locked video on stable support, disable stabilization. Your camera manual gives the final rule for tripod shooting because some systems detect stable support while others can hunt and introduce blur where no shake exists.
Does IBIS work with lens stabilization?
On compatible camera-and-lens pairs, in-body and lens stabilization can operate together. Your camera body and lens share motion data and divide correction across axes rather than moving independently. Coordinated systems help with long lenses, though exact behavior depends on the body, lens, mount, and firmware.
Which camera stabilization system suits your work?
No single camera stabilization system leads for every type of shooting. Your choice depends on focal length, lens compatibility, stills or video needs, electronic crop, and tripod behavior. A body with strong IBIS helps compact and manual lenses, while a stabilized telephoto lens remains valuable for distant subjects.