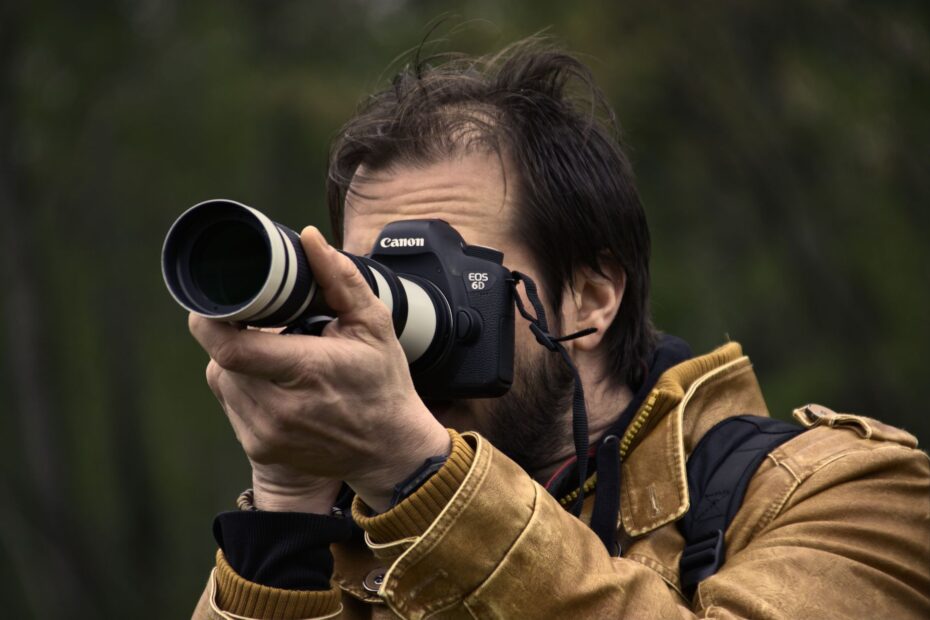
Light entering the lens lets the camera analyze detail, move internal glass, and confirm whether the selected subject falls on the sharp image plane. Your camera does not guess distance alone; it reads image information at the sensor or through a dedicated AF path.
This explanation covers AF measurements, focus modes, target selection, common errors, and the practical choices that shape your photos on DSLR, mirrorless, and smartphone cameras.
Autofocus Turns Light Into a Focus Decision
A portrait can appear sharp on your rear screen while focus sits on an ear, shirt collar, or wall behind the subject. Sharp focus means light from a subject forms its clearest image on the sensor plane, or on film in a film camera. Your autofocus system moves the lens toward that optical position.
Light passes through the lens before focus is measured
Every AF decision starts with light entering your lens. The camera examines that light after it passes through the optics, so focus comes from the real image path rather than subject distance alone. A subject 8 feet away can still confuse your camera when its surface has little texture.
Your lens changes focus by shifting one or more optical elements. The lens focus motor moves those glass groups forward or backward in tiny increments, changing where the focused image lands. The sensor stays fixed inside the camera body.
Several parts share the focus task
Five parts take part in autofocus: the lens gathers light, an AF sensor or imaging sensor reads focus information, the processor interprets that information, the motor shifts lens elements, and your selected target tells the camera where to look.
- Lens optics bend light toward the sensor and alter focus distance through moving glass elements.
- Focus motor shifts lens groups after the camera sends a movement command.
- AF sensor reads light paths in a DSLR or sensor pixels in a mirrorless camera.
- Camera processor calculates lens direction and travel distance from the available focus data.
- Focus target gives your camera a detail-rich area, such as an eye, edge, seam, or logo.
That division explains why a fast body cannot fully overcome a slow lens focus motor. It also explains why an expensive lens struggles with a plain gray wall. Your subject contrast, selected AF point, and lens mechanics all shape the result.
Those variables determine not only where the camera looks, but how its focusing cycle proceeds after you press the shutter.
The Autofocus Loop Moves From Half-Press to Confirmation
A half-press starts more than the shutter release. It tells your camera to inspect the active target, judge sharpness, and move the lens until image detail reaches an accepted focus state. For a still subject, that loop can stop after one correction; for motion, it keeps running.
The camera completes a rapid chain of checks
- Select the target Your chosen focus area, face detection setting, or tracking mode identifies the detail that receives priority.
- Read incoming light The camera samples light through the lens at the active AF point.
- Calculate correction The processor decides whether the lens must move nearer, farther, or remain in place.
- Shift lens optics The focus motor moves internal glass groups rather than moving the sensor toward the subject.
- Verify sharpness The camera checks the result, then confirms focus, makes another correction, or continues tracking.
A Canon EOS R1, Nikon Z-series body, or Sony Alpha mirrorless camera can repeat that cycle through a burst sequence. Your focus box follows an eye or athlete while the lens makes constant small corrections. In a quiet room, you may hear faint motor movement.
Focus confirmation marks a temporary stopping point
For a stationary subject, single-servo AF locks after the camera reaches an accepted position. Your camera may beep, show a green dot, or display a focus confirmation mark. That signal means the system found sufficient detail at the selected point.
Focus lock lets you hold that distance while changing composition. Place a single AF point on an eye, half-press to lock focus, then shift your framing slightly. Your camera holds the original distance until you release the button or switch focus control to a back button.
Reframing after focus lock changes the camera-to-subject distance. At close range with a wide aperture such as f/1.4, place the active AF point directly on the eye instead of making a large reframe.
The confirmation signal does not mean every part of the photo will look sharp. It confirms focus at one distance plane. Depth of field controls how much space before and behind that plane appears acceptably sharp in your finished image.
Phase Detection and Contrast Detection Measure Focus Differently
The correction step depends on the camera’s measurement method. Phase-detection autofocus tells the lens which direction to move before movement begins, while contrast-detection autofocus searches through positions until image detail reaches its strongest edge contrast.
Phase detection reads direction and estimated distance
Phase-detection autofocus splits incoming light into two views and compares their alignment. Misaligned views tell the camera that focus sits in front of or behind the sensor plane. The amount of misalignment also estimates how far the lens needs to travel.
That directional information suits moving subjects. Your camera can push the lens toward a runner, then measure the next position before the runner reaches it. A dedicated AF module in a DSLR and on-sensor phase detection in a mirrorless body follow the same optical principle through different hardware.
Contrast detection searches for stronger edge detail
Contrast-detection autofocus measures local contrast in the image. Fine details look stronger at correct focus, while blurred edges blend into softer tones. The camera moves the lens, reads contrast again, and stops near the position with the highest measured contrast.
This method can deliver precise focus, but it has no direct direction signal at the start. The lens can move past focus and reverse direction, a pattern called hunting. Hybrid autofocus joins phase detection for the larger move with contrast analysis for final confirmation.
| Feature | Phase-detection autofocus | Contrast-detection autofocus |
|---|---|---|
| Direction information | Shows whether focus must move nearer or farther. | Finds direction through a search movement. |
| Initial response | Fast because the camera estimates lens travel. | Slower because the camera samples several positions. |
| Fine accuracy | Can be highly accurate, though DSLR alignment affects results. | Reads the imaging signal itself for precise final focus. |
| Hunting tendency | Lower with a clear target and adequate light. | Higher on flat, dark, or repeating-detail subjects. |
In phase detection vs contrast detection autofocus, neither method wins in every scene. Phase detection suits a bird crossing the frame, while contrast analysis suits precise static detail. Modern hybrid autofocus gives your camera a fast starting move and a sensor-based focus check.
DSLR, Mirrorless, and Smartphone Cameras Read Focus Data in Different Places
The location of focus measurement changes what you see through the viewfinder and where errors can occur. A DSLR sends part of the light to a separate AF module during optical-viewfinder shooting, while mirrorless cameras inspect focus directly from the imaging sensor.
DSLR bodies send light to a dedicated AF module
Inside a traditional DSLR, the main mirror reflects light upward to the optical viewfinder. A smaller secondary mirror sends part of that light downward to a dedicated AF module in the body. That module delivers phase-detection information while you view the scene through glass.
This design gives fast response with the optical viewfinder active. Yet the AF module sits on a separate light path from the imaging sensor. Small alignment errors among the lens, mirror assembly, and module can place focus slightly ahead of or behind the intended sensor plane.
Advanced DSLRs include AF microadjustment for that reason. You can tune a specific lens and body pairing for viewfinder phase detection. Live View commonly relies on sensor-based focus, so it does not share the same separate-path alignment issue.
Mirrorless cameras focus on the imaging sensor
Thousands of specialized phase-detection pixels can be distributed directly across the imaging sensor. Your mirrorless camera reads phase information where the finished image is recorded, then checks contrast near the final focus position. This is how mirrorless camera autofocus works without a dedicated AF module or moving mirror.
Your focus area can reach closer to the edge of the frame than older DSLR layouts allowed. A Sony Alpha body can track an eye near a frame edge because focus measurement spans a broad sensor area instead of a central group of separate AF points.
Smartphones add scene recognition to sensor-based focus
How smartphone autofocus works starts with sensor-based focus analysis, a compact moving lens group, and software that identifies faces, text, pets, or nearby objects. Your phone lens contains a tiny moving optical group, while its processor analyzes the scene and selects a likely target.
Some phones also gather depth data through time-of-flight sensors, laser systems, or dual-pixel information. That added distance estimate helps in dim scenes, but visible detail still matters. Your phone can select a face at 3 feet yet struggle in a dark room with weak texture.
| Camera type | Primary focus measurement | Practical result |
|---|---|---|
| DSLR with optical viewfinder | Dedicated phase-detection module | Fast focus response with optical viewing. |
| Mirrorless interchangeable-lens camera | On-sensor phase detection and contrast analysis | Wide-frame coverage and strong subject tracking. |
| Smartphone | On-sensor analysis and scene recognition | Automatic target selection in a compact camera module. |
The move toward mirrorless cameras reflects design flexibility, not a claim that DSLR autofocus lacks capability. Your camera choice changes coverage, tracking controls, lens options, and viewfinder behavior for the subjects you photograph.
AF Points and Subject Detection Choose What Receives Focus
A camera can only focus on detail selected for measurement. AF points are locations where the camera samples focus information, while focus-area modes tell it whether to inspect one point, a cluster, a broad region, or nearly the full frame.
Area modes control target selection
| Focus-area mode | How target selection works | Useful scene |
|---|---|---|
| Single-point AF | You place one AF point on a precise detail. | Portrait eyes, flowers, architecture, still life. |
| Spot AF | You select a smaller point for a narrow target. | Eyes behind branches or a small object detail. |
| Zone AF | You give the camera a group of points to choose from. | Players moving through a predictable frame area. |
| Wide-area AF | The camera searches across a large region. | Walking subjects with face and eye detection active. |
| Automatic-area AF | The camera selects from much of the frame. | Quick photos with a clear main subject. |
Single-point AF gives you close control because you choose the exact detail. Place it on the nearest eye in a portrait rather than a cheek, eyebrow, or shirt seam. Your selected point needs a clear edge with enough contrast for accurate measurement.
Subject detection identifies likely targets before focus measurement
Face, eye, and subject detection do not replace autofocus measurement. Recognition software identifies a likely face, animal eye, vehicle, or person, then directs the phase or contrast system toward that target. The lens still needs a usable signal before it can focus sharply.
A bird perched in reeds shows the limitation. Your camera may recognize the bird, but a branch closer to the lens can cross the active area and pull focus forward. Select a smaller area, place the point on the bird’s head, or begin tracking while the bird remains clear.
Eye detection needs supervision in group portraits. Watch the active box because the camera can select a farther face or the wrong eye where faces overlap at different distances.
Canon calls continuous-servo AF “AI Servo” on many EOS bodies. Nikon labels it AF-C, and Sony also labels it AF-C. Each name refers to the same broad task: updating focus while subject distance changes.
Single-Servo and Continuous-Servo AF Match Different Subject Motion
Motion changes the focus task because a locked distance can become wrong a moment later. Single-servo AF, labeled AF-S or One-Shot AF, focuses once and stops. Continuous-servo AF, labeled AF-C or AI Servo, keeps measuring and shifting lens position.
Single-servo AF suits stable subject distance
AF-S suits a building, seated portrait, landscape, or object on a table. Press the shutter halfway, wait for focus confirmation, and the lens stops moving. Your camera then records the frame without chasing distance changes that are not happening.
Depth of field can hide minor movement at f/8 in a landscape. At f/1.8 from 2 feet away, a subject leaning forward 1 inch can move an eye outside the sharp plane. Switch to AF-C for a portrait subject who sways, turns, or steps toward you.
Continuous-servo AF predicts the next distance position
How continuous autofocus works is a cycle of repeated distance measurements and lens corrections between frames. Tracking systems also estimate subject direction and speed, allowing the lens to move toward the expected next position rather than reacting only after the subject has moved.
A soccer player running toward your camera changes focus distance far faster than a player moving side to side. Set AF-C with a zone or tracking area, place it on the torso or face, and keep the subject inside that region. Your camera cannot track a target outside the assigned area.
| Scene | AF mode | Focus-area selection |
|---|---|---|
| Still portrait | AF-S or One-Shot AF | Single point or eye detection. |
| Landscape on tripod | AF-S with focus lock | Single point on a distant detail. |
| Children running | AF-C or AI Servo | Zone AF or subject tracking. |
| Bird in flight | AF-C | Wide tracking area after initial subject placement. |
| Pet moving indoors | AF-C | Animal detection with a medium zone. |
| Video interview | Continuous video AF | Face or eye detection with controlled tracking speed. |
Professional photographers rely on autofocus for weddings, sports, wildlife, news, and fast editorial assignments. Manual focus still suits a locked tripod scene, a macro setup, planned video focus pulls, or cluttered foregrounds where your camera selects the wrong plane.
Even with the appropriate mode selected, weak visual information can leave autofocus without a dependable target.
Low Detail, Low Light, and Foreground Clutter Cause Focus Errors
Why camera autofocus hunts comes down to weak or confusing information. A black jacket in a dim room, blank blue sky, repeating fence wires, and fogged glass can leave the system without one clear focus position.
Weak detail confuses phase and contrast measurements
Low light reduces the contrast reaching your autofocus hardware. Low subject contrast removes the edges needed by phase and contrast measurements. Repeating patterns can produce several similar answers, sending the lens back and forth before it locks on an unintended plane.
- Dark scenes reduce light for phase comparison and contrast analysis.
- Plain surfaces contain few usable edges, so place the point on a seam, label, eye, or color boundary.
- Foreground clutter gives the camera a closer, high-contrast object that can pull focus away.
- Rapid movement can carry your subject beyond the tracking area before the next focus update.
- Close-focus limits stop a lens from focusing nearer than its stated minimum focus distance.
An autofocus assist beam can help at close distances in dim indoor scenes. Some cameras project a pattern of light or activate a lamp so the AF system sees stronger contrast. Avoid that beam around animals, performers, or reflective glass, where it can distract a subject or bounce into your lens.
Soft images do not always show an autofocus error
A true focus miss places the sharpest detail on the wrong distance plane. Motion blur looks different: the entire subject can smear in one direction because shutter speed was too slow. Camera shake can soften the whole frame, including background detail that should remain fixed.
Depth of field can make accurate focus appear wrong. A 200mm lens at f/2.8 from close range creates a very thin zone of acceptable sharpness. Your camera can focus accurately on an eye while the nose and ears fall soft because they sit outside that zone.
Focal length, aperture, subject distance, and movement shrink your margin for error. A wide aperture narrows depth of field. A longer lens enlarges blur. A closer camera position magnifies small distance changes. Your settings need enough shutter speed and depth for the framing and motion you chose.
Practical Focus Settings Match the Subject and Scene
Reliable focus begins with a focus area that matches the subject’s movement. Give your camera narrow control for a fixed detail, then select a larger tracking region only for motion that can leave a single point.
Static subjects reward precise point placement
For a product label, flower center, or still portrait, select single-point AF or a small-area setting. Place that point directly on the intended detail and wait for confirmation. Your camera then sees one clear target instead of a broad scene full of competing edges.
Move the AF point rather than relying on heavy focus-and-recompose work at close range. That choice matters with wide apertures, macro photography, and head-and-shoulders portraits. A small camera-angle change can shift the focused plane away from the eye.
Moving subjects need room within the active area
For a cyclist, pet, or child at play, select AF-C or AI Servo and choose a zone sized for the expected movement. Start with that zone over the main subject, then pan smoothly to keep the target inside. Your camera needs ongoing visual contact to update focus distance.
Tracking sensitivity controls how quickly your camera abandons a blocked subject. A slower response helps a runner passing behind a goalpost. A faster response suits a new subject entering an empty frame, such as a vehicle arriving from the side.
Small scene changes solve difficult focus situations
- Add more light Open curtains, change position, or add controlled light so your camera sees stronger detail.
- Target a hard edge Place the AF point on an eye, text edge, seam, or contrasting color boundary.
- Clear the foreground Remove branches, glass reflections, or bright objects from the focus area.
- Enable assist light Activate the autofocus assist beam for quiet, close indoor subjects where it will not distract.
- Check focus distance Step back once your lens reaches its minimum focus distance.
- Switch to manual focus Turn the focus ring through glass, dense clutter, or deliberate macro compositions.
Manual focus gives you direct control, but it does not remove optical limits. Magnified live view, focus peaking, and a tripod help with close work where a millimeter matters. Your screen can show a sharp-looking preview while small movement shifts focus before exposure.
For close-up photography, place focus on the feature that carries the image. At 1:1 macro magnification, shifting your body a few millimeters can move the focus plane farther than a careful lens adjustment.
How camera autofocus works feels less mysterious after you watch the active point, identify the selected target, and match the AF mode to subject motion. Your camera supplies speed, while your focus area and subject placement direct that speed.
What Your Camera Needs for Reliable Focus
Your camera does not see subjects as names or stories. It sees light, edges, distance changes, and selected targets. Give it a clear detail to inspect, select AF-S for stable distance and AF-C for changing distance, then judge soft photos through focus plane, shutter speed, and depth of field before blaming autofocus.
FAQ
How does camera autofocus work?
Light passing through your lens is analyzed for sharpness, prompting the focus motor to shift optical elements toward the selected target. Phase detection estimates direction and distance, while contrast detection searches for the strongest edge detail.
How does a camera know when a subject is in focus?
Paired light views align with phase detection, while contrast detection confirms focus when edge contrast reaches its peak. The confirmation mark means the active AF point found enough detail at one distance plane, not that every object in the frame is sharp.
What is the difference between phase-detection and contrast-detection autofocus?
Phase-detection autofocus compares two light paths and tells your lens whether to move nearer or farther before movement begins. Contrast-detection autofocus searches for the lens position with the highest image contrast, which can produce precise focus but can hunt in dim or low-detail scenes.
How do mirrorless and DSLR autofocus systems differ?
DSLR cameras with an optical viewfinder send light to a dedicated phase-detection AF module. Mirrorless cameras read focus data directly from the imaging sensor through on-sensor phase detection and contrast analysis. Your mirrorless body avoids separate-path alignment errors but depends on its sensor and processing hardware for every focus measurement.
What are AF points, and how should photographers choose them?
AF points are locations where your camera samples focus information. Select a single point for a precise detail such as a portrait eye, a zone for predictable movement, and a wider area for a moving subject with face or eye detection. Your selected point should rest on a clear, contrast-rich edge.
What is the difference between AF-S and AF-C autofocus modes?
AF-S, also called One-Shot AF, locks focus at one distance for a stable subject. AF-C, also called AI Servo on Canon cameras, keeps measuring distance and moving the lens for motion. Your subject’s distance from the camera determines which mode fits the scene.