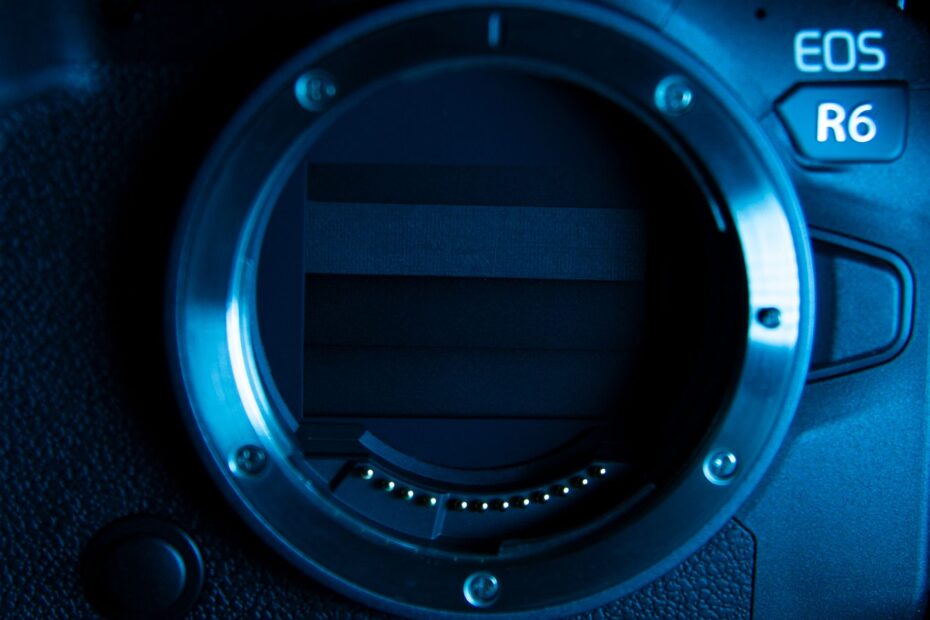
Behind the lens, millions of tiny collecting sites measure focused light, while electronics translate those readings into the data that forms a photograph. Your camera records photon energy during an exposure, then turns that captured pattern into numerical image data.
You will see how focused light reaches the image sensor, how color and brightness become data, and how sensor size, ISO, readout, and care affect your photographs.
The Sensor Records the Focused Image
Behind the lens sits a small rectangular image sensor that receives the scene as an upside-down optical image. An image sensor is a grid of light-sensitive locations arranged across a silicon chip, allowing your camera to record brightness across the frame.
Your camera is not itself a sensor. It is an imaging system in which the lens directs light, the aperture limits that light, the shutter sets exposure duration, the sensor records the exposure, the image processor interprets data, and the memory card stores the finished file.
A sensor package contains more than bare silicon. Cover glass sits over the chip, microscopic lenses steer light toward collecting sites, color filters sit above those sites, and wiring carries measured charge into readout circuitry.
| Part | Role | Visible result |
|---|---|---|
| Lens | Focuses rays into an optical image | Sharpness, angle of view, blur |
| Aperture | Sets the opening inside the lens | Brightness and depth of field |
| Shutter | Sets exposure duration | Motion blur or motion freezing |
| Sensor | Turns received light into electrical charge | Detail, noise, tonal information |
| Image processor | Interprets numerical sensor data | Color, contrast, sharpening, file type |
That separation explains a common problem. A damaged lens softens detail before light reaches the sensor, while dust on the sensor cover glass leaves fixed spots in blue skies or plain walls. Focused light must reach the recording surface before electronics have anything to read.
Focused Light Becomes an Exposure
The Lens Projects a Real Optical Image
Light from a distant tree enters the lens as rays from countless points in the scene. Lens elements bend those rays so each point lands at a matching location on the sensor plane, changing a three-dimensional view into a flat pattern of light.
Focus shifts lens elements until that projected pattern is sharp at the sensor. Your autofocus system examines contrast or phase information, then moves glass until fine edges form the narrowest possible image on the recording surface.
A subject five feet away and a skyline one mile away need different focus positions because their rays enter the lens at different angles. Miss that position, and later electronics record softness rather than restoring detail that never reached the sensor.
Exposure Collects Photon Energy
Exposure starts after focus reaches the sensor plane. Aperture diameter, shutter duration, scene brightness, and the collecting area of each photosite determine how many photons reach a location.
- Light enters glass. Rays from the scene pass through the lens and form a focused image behind it.
- Aperture limits rays. A wider opening passes more light during the same shutter duration.
- Shutter opens. Sensor sites gather photons during the selected exposure interval.
- Charge gathers. Each light-sensitive site stores an electrical response linked to received light.
- Shutter closes. The stored pattern becomes raw material for image data.
Your choice of 1/1000 s rather than 1/60 s leaves each site far less time to gather light. In daylight, that can freeze a cyclist; indoors, it can leave a weak signal that high ISO amplification reveals as grain-like noise.
Aperture changes follow a different relationship. Moving from f/4 to f/2 admits four times as much light because f-numbers describe a ratio rather than a simple opening width. That extra light also narrows the depth range that appears acceptably sharp.
Exposure is not an image file yet. It is a patterned collection of electrical charges, and each charge starts inside a photodiode.
Photodiodes, Photosites, Pixels, and Megapixels
Photodiodes Turn Photons Into Charge
Silicon responds to light because incoming photons release electrical charge inside a light-sensitive semiconductor region. Each photodiode gathers that charge during exposure, so brighter parts of your scene leave larger stored signals than shadows.
Your sensor does not label a site as cloud, face, or brick. It records measured light levels. A bright white shirt can fill a photosite close to its charge limit, while a dark jacket can leave little signal above the electronic noise floor.
Microlenses sit above modern photosites and funnel light into the photodiode beneath. Their role becomes clear near the corners of wide-angle lenses, where rays arrive at steeper angles and can miss part of the active collecting area.
Photosites and Pixels Describe Different Things
A photosite is a physical location on the chip that collects light. A pixel is an image-data location in the finished photograph, formed from sensor measurements after color reconstruction, noise reduction, resizing, or cropping.
| Term | Meaning | What it changes for you |
|---|---|---|
| Photodiode | Light-sensitive semiconductor element | Turns photon arrivals into charge |
| Photosite | Physical sensor location containing a photodiode | Sets how much light one location gathers |
| Pixel | One location in an output image | Sets displayed or printed detail |
| Megapixel | One million output pixel locations | Sets total image dimensions and crop room |
Megapixels describe resolution, not automatic image quality. A 24-megapixel file offers substantial cropping and large-print potential, yet a 24-megapixel sensor with larger individual sites gathers more light per site than a denser chip of the same physical size.
Two APS-C cameras can both record 24 megapixels while carrying different site geometry and readout circuitry. Your files can differ in shadow noise, highlight headroom, and fine-detail rendering even though the stated resolution matches.
Lens sharpness, subject movement, focus accuracy, anti-alias filtering, and processing also shape visible detail. Color capture adds another layer because a bare photodiode records brightness without identifying color.
Color Filters Produce RGB Information
Silicon Records Brightness Without Color
A photodiode records the quantity of arriving light rather than visible color. Red light and blue light can produce similar electrical responses at a bare site, so a color sensor needs filters that separate portions of incoming light.
Most cameras place a Bayer filter array over photosites. The Bayer filter has red, green, and blue filters in a repeating pattern, with twice as many green-filtered sites because human vision is highly sensitive to brightness detail carried through green.
| Filter position | Light reaching its photodiode | Recorded value |
|---|---|---|
| Red | Mostly red wavelengths | Red-channel brightness |
| Green | Mostly green wavelengths | Green-channel brightness |
| Blue | Mostly blue wavelengths | Blue-channel brightness |
| Neighboring group | Different filtered samples | Material for full RGB estimation |
Your red-filtered photosite does not record a complete RGB description of the scene point beneath it. It captures one channel, while nearby sites capture other channels. The image processor receives an incomplete color mosaic.
Demosaicing Forms Full RGB Pixels
Demosaicing estimates missing color values at every output pixel by examining neighboring sensor samples. A green sample beside red and blue samples becomes a full RGB pixel after the processor estimates the channels its own site did not record.
Edges make that task difficult. A red flower against a green leaf can show false color or zipper-like edges after poor reconstruction, which explains why different RAW converters can render the same sensor file with different fine detail.
Monochrome sensors omit the Bayer filter array. They record luminance at every site, gain light that color filters block, and avoid demosaicing, but your resulting file contains no native color information.
The filtered mosaic must now leave the sensor. The electronic path in how a camera sensor works changes physical charge into numerical values that your camera stores and edits.
Electronics Turn Charge Into Image Data
Readout Moves Charge Into Circuitry
After exposure, the camera reads the sensor row by row or through grouped channels. Circuitry converts each stored charge into a voltage signal, allowing downstream electronics to inspect the spatial pattern captured at each photosite.
Your shutter can close in a fraction of a second, yet readout takes more time. Fast sensors move data through parallel channels; slower readout leaves a longer gap between the top and bottom portions of a frame.
Modern CMOS chips place amplifiers and control circuits close to pixel areas. That local circuitry enables rapid capture rates, phase-detect autofocus points, and video functions, though it also occupies chip area that cannot collect light.
The ADC Assigns Digital Values
An analog-to-digital converter, or ADC, turns each measured voltage into a numerical value. With 14-bit capture, the value range holds 16,384 code levels per channel, allowing fine tonal separation before editing stretches shadows or reduces highlights.
- Charge becomes voltage. Sensor circuitry translates stored electrons into measurable analog signals.
- ADC samples voltage. Each analog signal receives a numerical brightness value.
- Metadata joins data. The camera records exposure settings, lens details, time, and shooting information.
- Processor interprets samples. It demosaics colors and applies settings for a rendered image.
- Storage writes file. RAW data or a processed JPEG moves to the memory card.
A RAW file stores minimally interpreted sensor measurements plus metadata. You retain more control over white balance, sharpening, noise reduction, and highlight recovery because the camera has not permanently baked those choices into output pixels.
A JPEG travels further through the image processor. It receives demosaicing, color conversion, contrast shaping, sharpening, and compression before storage. Your camera can produce an attractive JPEG immediately, but heavy later editing has less original data available.
For example, a sunset RAW file can retain separate values in bright orange clouds and dark foreground rocks. A JPEG with aggressive contrast can merge those values into clipped white or blocked black areas, leaving less room for later editing.
File format is not the only limit. Sensor format, photosite capacity, read noise, and ISO amplification set much of the quality available before processing starts.
Sensor Size, Resolution, and ISO Shape Image Quality
Physical Format Sets Recording Area
Camera sensor size explained starts with physical dimensions. A Full Frame sensor measures about 36 by 24 millimeters, APS-C measures about 23.6 by 15.7 millimeters, and Micro Four Thirds measures 17.3 by 13 millimeters.
Your lens projects an image circle, while a smaller sensor records a narrower central portion of that projection. A 50mm lens keeps the same focal length on every format, yet it frames a tighter view on APS-C or Micro Four Thirds than on Full Frame.
Canon APS-C cameras have a 1.6x crop factor, while several APS-C systems have a 1.5x crop factor. A 50mm lens on Canon APS-C frames similarly to an 80mm lens on Full Frame, which affects your portrait and wildlife framing.
| Format | Approximate size | Common role | Practical result |
|---|---|---|---|
| Full Frame | 36 x 24 mm | Still photography and video | Wide view with a given lens and strong low-light potential |
| APS-C | About 23.6 x 15.7 mm | Enthusiast cameras | Narrower view and smaller bodies |
| Micro Four Thirds | 17.3 x 13 mm | Travel and video systems | 2x crop factor and compact lens options |
| Super 35mm | Varies by video standard | Cinema production | Broad cinema-lens support and video framing |
| Phone sensor | Far below Full Frame area | Mobile photography | Computational processing offsets small sites |
Photosite Capacity Affects Dynamic Range
Sensor size affects results through physics rather than a label. Given similar resolution and technology, a larger chip can carry larger photosites, and larger photosites can collect more photons before reaching full-well capacity.
Your low-light image improves as more signal reaches the sensor before amplification. More collected photons raise the signal above random variation, giving cleaner shadows and smoother color in dim rooms, night streets, and indoor sports venues.
Dynamic range is the span between usable shadow detail and bright clipping. Full-well capacity sets the highlight ceiling, while read noise limits how far your dark detail can rise before mottling and color speckles appear.
ISO Amplifies the Recorded Signal
ISO does not make silicon collect extra light after the shutter closes. ISO amplification raises the recorded strength of a captured signal, making a dark exposure appear brighter while raising sensor noise and read noise.
Set exposure with aperture, shutter duration, and available light before relying on high ISO. Your image at ISO 6400 can look clean with generous light on the sensor, while an underexposed ISO 6400 file pushed further in editing can look rough.
Expose carefully around bright highlights. A clipped photosite has reached its storage limit, and lowering exposure in editing cannot restore light data that never fit in the well.
Depth of field needs careful language too. Sensor format affects blur only after matching framing and aperture equivalence; focal length, subject distance, aperture diameter, and framing distance all shape the final look.
Those optical trade-offs shape the image itself, while readout design determines how efficiently the sensor delivers it.
CMOS and CCD Have Different Readout Designs
CCD Transfers Charge Across the Chip
CCD stands for charge-coupled device. In a CCD sensor, charge packets move across the chip toward shared output circuitry, a design known for uniform readout behavior but higher power demand and limited high-speed integration.
Your older compact camera, scientific instrument, or industrial system can contain a CCD sensor. CCD still serves specialized roles, but its historical image-quality reputation does not mean every CCD outperforms every CMOS design.
CMOS Reads Through Local Circuitry
CMOS stands for complementary metal-oxide-semiconductor. A CMOS sensor has active circuitry near pixel locations and reads data through parallel channels, lowering power demand and enabling rapid bursts, video, autofocus functions, and on-chip processing.
| Trait | CMOS sensor | CCD sensor |
|---|---|---|
| Signal movement | Local conversion and parallel channels | Charge transfer toward shared outputs |
| Power demand | Lower in current designs | Higher through charge transfer |
| Video speed | Strong fit for high-frame-rate capture | Less suited to consumer video speed |
| On-chip functions | Autofocus, ADC, and processing fit readily | More external circuitry is needed |
CMOS dominates current cameras because it suits compact, battery-powered designs. Your phone, mirrorless body, action camera, and many machine-vision units rely on CMOS readout, though image quality depends on engineering beyond that single label.
Readout Timing Changes Motion Rendering
Rolling shutter reads separate rows at slightly different times. Fast horizontal movement can lean vertical poles, and a spinning propeller can bend into odd shapes because the top and bottom of the frame record different moments.
Your video footage can show rolling-shutter wobble during quick pans, vibration, or rapid subject movement. Shorter exposure reduces motion blur but does not remove the row-to-row timing gap behind geometric skew.
Global shutter records all pixel locations at the same moment before readout. It suits industrial inspection, machine vision, flash synchronization, and action footage, though global-shutter designs can involve trade-offs in pixel area or dynamic range.
Dust and physical damage affect either architecture. Careless cleaning can turn a removable spot into a repair problem, so sensor care belongs beside technical specifications.
Sensor Care and Specification Choices Affect Your Results
Lens Changes Introduce Dust
Every lens change briefly opens the camera mount to airborne dust. A small speck on the sensor cover glass casts a soft-edged shadow, most visible at f/11 or f/16 against blue sky, white paper, or a bright studio background.
Your sensor is not exposed bare silicon during normal shooting. The visible surface is a protective filter stack, but that stack can collect oil, scratch, crack, or carry moisture marks after careless contact.
- Point mount downward. Hold your camera downward during lens changes so loose dust has a less direct route inward.
- Ready replacement lens. Remove its rear cap only as the mounted lens comes off.
- Use hand blower. Direct short bursts without touching the sensor surface or inserting the blower tip into the mount.
- Check at f/16. Photograph an evenly lit pale surface and inspect the file for stationary dark marks.
- Cap openings quickly. Replace body and rear lens caps before setting either component down.
Contact Cleaning Needs Restraint
Dry dust responds well to a blower and built-in sensor-shake systems. Stubborn spots can be lubricant mist, dried moisture, or residue, and those marks need a sensor swab sized for your format plus cleaning fluid made for optical sensor stacks.
Use one gentle pass per side of a clean swab, then inspect another frame. Reusing a dirty swab drags particles across the filter surface, while excess fluid leaves streaks or seeps into areas where it does not belong.
Stop contact cleaning after repeated marks, visible scratches, unexplained streaking, or suspected moisture. A camera service technician can inspect the filter stack without turning uncertainty into physical damage.
Physical contact, gritty debris, wet cleaning fluid, condensation, and impact can damage the surface above the sensor. Direct sunlight through a lens can also heat a concentrated area during a long careless exposure, especially with the camera aimed at the sun.
Specifications Matter Only in Context
A specification sheet becomes useful after you match it to your work. Your landscape files benefit from dynamic range and resolution; indoor sports favor rapid readout, autofocus performance, and clean high-ISO output; video places extra weight on rolling-shutter control and recording modes.
- Start with format. Match field of view, body size, lens selection, and depth-of-field control to your subjects.
- Set resolution needs. Higher megapixels suit large prints and tight crops, while moderate counts reduce storage and processing load.
- Check dynamic range. Bright-to-dark scenes reward strong highlight capacity and low shadow noise.
- Review readout speed. Fast action and video benefit from less rolling-shutter distortion and quicker bursts.
- Judge low-light files. Look beyond ISO numbers toward photosite size, read noise, lens aperture, and exposure latitude.
A bird photographer can value APS-C reach because tighter framing places more pixels on a distant subject. A portrait photographer working in dim interiors can prefer Full Frame for wider framing options and larger-site potential at a given resolution.
How a camera sensor works matters at this choice point because the sensor is not a scorecard number. It is the light-recording foundation beneath every exposure choice, file format, and photograph you produce.
Final Takeaways
Light enters through the lens, exposure gives each photodiode time to gather charge, and electronics turn that charge into editable image data. Your strongest results come from matching sensor format and readout behavior to your subject, then giving the sensor enough light before ISO amplification raises a weak signal.
FAQ
Can you explain how a camera sensor works?
A camera sensor receives focused light from the lens through millions of tiny photosites. Each photodiode turns photon arrivals into electrical charge, an analog-to-digital converter assigns numerical values, and the image processor turns those values into a RAW file or JPEG that your camera stores.
What are the two main types of camera sensors?
Most interchangeable-lens cameras use CMOS chips, while CCD devices represent the other major sensor design. Your current phone or interchangeable-lens camera almost certainly has CMOS because it has low power demand and rapid readout, while CCD remains present in some scientific and industrial equipment.
What is the difference between a photosite, a pixel, and a megapixel?
A photosite is a physical light-collecting location on the chip, while a pixel is an image location in your final file. A megapixel means one million pixels, so it describes output resolution rather than the light-gathering capacity of each sensor location.
How does a camera sensor turn light into a digital image?
The lens focuses light onto photodiodes, which collect electrical charge in proportion to photon energy. Your camera reads that charge, the ADC assigns digital values, and the image processor forms a RAW file or a rendered JPEG.
How does a camera sensor capture color when each pixel detects light?
Most color sensors place a Bayer filter over their photosites. Red, green, and blue filters allow each site to record one channel, then demosaicing estimates missing RGB color channels from nearby measurements.
What is the difference between CMOS and CCD camera sensors?
CMOS sensors read data through local circuitry and parallel channels, supporting rapid readout and low power demand. CCD sensors transfer charge across the chip toward shared output circuitry, which suits some specialized scientific and industrial roles.