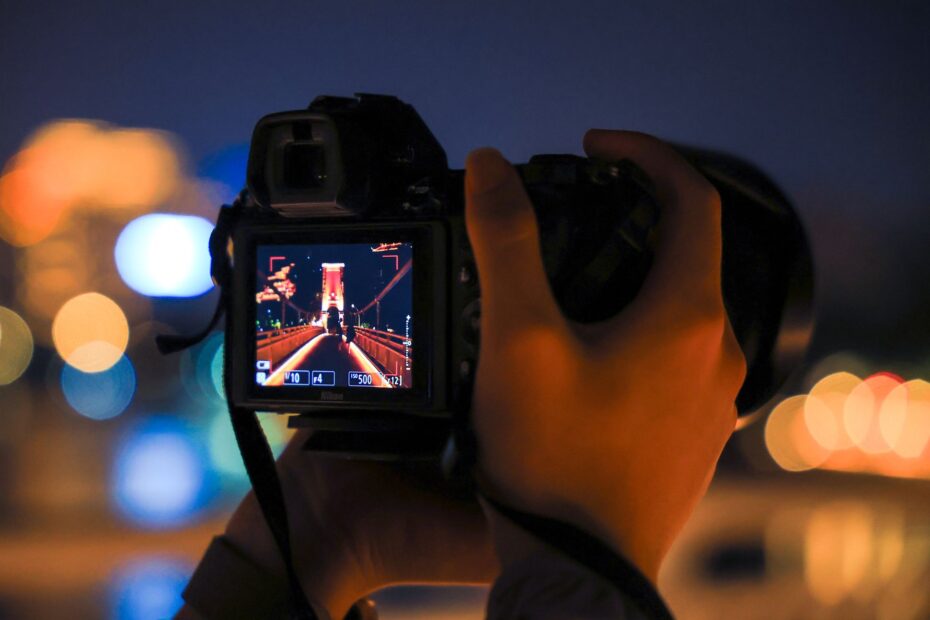
Before capture, a preview path carries the scene from the lens to the display or eyepiece. In a DSLR, scene light travels through the lens, camera mirror, and prism to your eye. In a mirrorless camera, the image sensor sends a live image to a small display.
You’ll learn what each preview method reveals about framing, focus, color, motion, and exposure, along with practical setup choices for handheld shots, tripod work, video, and low-light scenes.
The Preview Path Shapes Your Framing Decisions
Before the shutter opens, your camera needs a way to show the scene through the taking lens or through sensor data. A camera viewfinder gives you a place to frame the subject, watch the edges, set focus, and spot a tilted horizon before the camera records the image.
Your camera may have an optical viewfinder (OVF), an electronic viewfinder (EVF), or live view on the rear LCD screen. Each route shows framing, but they differ in how accurately they show exposure, white balance, depth of field, and final image appearance.
Holding a camera against your face adds a third point of contact beyond your two hands. That braced position steadies your body, blocks side glare, and gives you a clearer view of a subject near the frame edge.
The DSLR Optical Path Sends Scene Light to Your Eye
Before a file reaches the sensor, real scene light travels through the lens and into your eye. That direct optical route gives you a bright, natural view in sunlight without a display refresh cycle or digital grain.
Five parts shape the optical image
- The lens gathers light. Scene light enters through the same lens that forms the image on your camera’s image sensor.
- The camera mirror redirects light. A reflex mirror set near 45 degrees sends light upward rather than allowing it to reach the sensor.
- The focusing screen forms an image. The lens projection lands on a small matte screen inside the camera body.
- The prism corrects orientation. A pentaprism, or lighter pentamirror, turns the projected image upright and corrects the left-to-right reversal.
- The eyepiece enlarges the view. The final lens group gives your eye a usable view of the focusing screen from a short distance away.
Without the prism assembly, the scene would appear upside down and reversed from side to side. A pentaprism uses internal reflections to correct that image, so a subject moving left in front of you also moves left in the finder.
Because the optical path runs through the taking lens, framing stays closely matched to the recorded photo. That matters at close range, where a separate viewing window above the lens can show a different slice of a flower, document, or tabletop object.
Unlike that fixed viewing window, the reflex mirror must move for each exposure, briefly interrupting what you see.
| Optical part | What reaches your eye | Practical effect |
|---|---|---|
| Taking lens | Scene light | Your framing follows the lens used for capture. |
| Reflex mirror | Upward reflection | The image sensor stays dark before exposure. |
| Pentaprism or pentamirror | Corrected image | Subject movement feels natural in the eyepiece. |
The DSLR Mirror Causes a Brief Viewfinder Blackout
The camera mirror must leave the sensor path during every DSLR exposure. Press the shutter button and the mirror flips upward, the optical route closes, and the viewfinder goes dark until the mirror returns.
At 1/1000 second, sensor exposure is brief, yet mirror travel and shutter movement still produce a visible interruption. You can feel that gap while tracking a bird in flight, a baseball player, or a child running across the frame.
Blackout during each DSLR frame is normal. A finder that stays dark after exposure can point to a stuck mirror, a depleted battery, or a mechanical fault.
Mirrorless camera bodies remove that moving mirror assembly. Light reaches the image sensor during composition, so the camera can send a live feed to the EVF or rear LCD screen before capture.
The Electronic Viewfinder Displays Sensor Data
With no reflex mirror above the image sensor, a mirrorless camera reads the sensor continuously and sends a live feed to a miniature OLED or LCD display inside the eyepiece. An electronic viewfinder is a close-range screen rather than a glass optical path.
Your eye sees the camera’s rendered image rather than direct scene light. In an optical viewfinder vs electronic viewfinder comparison, the OVF shows the scene through glass, while the EVF shows your camera’s current interpretation of exposure, color, and processing settings.
Digital overlays show shooting data
- Exposure preview. The EVF brightens or darkens as you change shutter speed, aperture, or ISO.
- White balance preview. The display shows color shifts from tungsten light, shade, or a custom white-balance setting.
- Focus magnification. A selected area enlarges so you can inspect detail in an eye, leaf, or textured fabric.
- Focus peaking. The display outlines high-contrast edges that fall near the focus plane.
- Histograms and grids. Screen overlays show tonal distribution, level lines, and framing guides before capture.
Low light exposes one clear EVF tradeoff. The camera can brighten a dim scene so you can place the subject, yet the feed can show visible noise, reduced smoothness, or refresh artifacts as light levels fall.
Preview Accuracy Depends on Coverage and Camera Settings
A preview helps you frame the image, but it does not promise every pixel in the final file. Some entry-level DSLR viewfinders show 95 percent coverage, which means the recorded photo includes a narrow border beyond the edges you saw.
Your finder magnification changes the apparent size of the scene. A 0.95x finder looks larger than a 0.70x finder, though magnification and coverage are separate specifications that affect different parts of your shooting experience.
| Preview system | What it shows well | What needs caution |
|---|---|---|
| Optical viewfinder | Motion, framing, and daylight visibility | Exposure and white balance changes remain unseen. |
| Electronic viewfinder | Exposure, color, focus aids, and overlays | Lag, noise, and refresh artifacts can appear. |
| Rear LCD screen | Sensor-based framing and live-view controls | Harsh sunlight can wash out the display. |
Exposure simulation has practical limits
Before the flash fires, EVF exposure simulation can give a misleading preview. Your camera may brighten the preview for composition even though the unlit room would look dark at the selected manual exposure.
Very dark scenes, long exposures, picture styles, and noise reduction can also separate the preview from the final file. Treat the histogram and highlight warning display as stronger exposure evidence than screen brightness alone, since LCD brightness can alter your impression.
Depth of field previews need similar caution. At wide apertures such as f/1.8, an EVF can show background blur clearly, yet preview brightness or a camera setting can make the effect look different from the recorded frame.
The Rear LCD and Phone Screen Use Live View
Held at arm’s length, the rear LCD uses sensor-based live view instead of an eyepiece. That position helps you frame from ground level, above a crowd, beside a tripod, or around a low foreground object.
Your phone screen also acts as a smartphone camera viewfinder. An iPhone or Android device sends image sensor data to the display, then adds touch focus, exposure controls, framing grids, and processing previews in real time.
Separate windows can shift close-range framing
Parallax error appears where the viewing window sits away from the taking lens. A rangefinder-style camera or simple compact camera can show a subject centered in its window while the lens records it slightly lower or to one side.
At a distant subject, that offset is small. Move within about 3 feet of a flower, receipt, or tabletop object and the shift becomes visible, which is why through-the-lens systems give you a closer match for close-up framing.
| Camera arrangement | Preview source | Parallax risk |
|---|---|---|
| DSLR eyepiece | Taking lens | Very low during normal shooting distances. |
| Mirrorless EVF | Image sensor | Very low because the sensor forms the preview. |
| Separate compact window | Offset viewing window | Higher at close range. |
The Diopter Sets the Eyepiece for Your Eyesight
A blurry eyepiece image does not always mean the lens missed focus. The diopter adjustment dial beside many camera viewfinders changes the eyepiece optics to suit your eyesight, much like a small prescription correction.
The diopter dial needs a simple setup
- Choose a bright scene. Point your camera toward an evenly lit wall or outdoor area with clear light.
- Find internal markings. Look at autofocus points, grid lines, or exposure numbers because those markings sit inside the camera.
- Turn the diopter dial. Rotate the small control slowly until the internal markings look sharp to your eye.
- Check a recorded photo. Photograph a focused subject and inspect the captured image at magnification on the rear LCD screen.
- Recheck after changes. New glasses or an accidental dial bump can shift your preferred setting.
Your diopter adjustment changes only the view through the eyepiece. Missed lens focus leaves the recorded photo soft, while an incorrect diopter leaves the photo sharp but makes finder markings and the scene look blurry to you.
Glasses wearers benefit from a deep eyecup or a camera body with suitable eye-relief distance. Pressing too close can hide the frame corners and leave smudges on the eyepiece.
Set rear-screen brightness high enough to see your composition outdoors, but do not judge final exposure from a bright display alone. Histogram data and highlight warnings give you a more stable reference during changing light.
Once exposure is judged with reliable tools, the remaining choice depends on how you need to frame and follow the subject.
The Shot Determines the Stronger Preview Choice
Bright sunlight reveals the clearest split between an eyepiece and a rear LCD screen. An optical finder gives you a direct view, while an EVF blocks side glare and shows exposure settings inside the eyepiece.
| Shooting situation | Useful preview choice | Reason |
|---|---|---|
| Sports or wildlife sequence | Optical finder or fast EVF | Your eye stays braced while tracking movement. |
| Manual-focus portrait | Electronic viewfinder | Magnification and peaking reveal fine focus detail. |
| Tripod landscape | Rear LCD screen | Waist-level viewing suits slow, careful framing. |
| Video recording | Rear LCD screen or EVF | The live feed shows recording framing and exposure. |
| Discreet street scene | Rear LCD screen | Arm’s-length framing draws less attention than an eyepiece. |
For a baseball outfielder crossing a bright field, an optical finder gives you continuous real-world motion except during each DSLR exposure. For a candlelit portrait at f/1.8, an EVF can brighten the scene and enlarge the nearer eye before you press the shutter.
Rear-screen framing suits awkward angles and tripod work, but extended arms reduce your stability. Choose the preview method that shows the information your shot needs, then account for its limits rather than treating any preview as the finished photograph.
Final Thoughts
Your preview system is a decision tool, not merely a window. Once you understand how a camera viewfinder works, you can use an optical finder for direct motion, an EVF for exposure and focus data, and the rear LCD screen where camera position matters more than bracing the body.
Each system shows part of the scene well. Your strongest results come from matching the preview method to the light, subject movement, shooting position, and information you need before capture.
FAQ
How does a camera viewfinder work?
A camera viewfinder shows the scene before capture through an optical route or a digital feed. In a DSLR, light travels from the lens through a mirror and prism to your eye. In an EVF or rear LCD screen, the image sensor supplies the live preview.
What is a camera viewfinder?
That is the preview system used to frame a subject and inspect the scene before capture. It can be an optical eyepiece, an electronic eyepiece display, or a rear LCD screen running live view.
What is the difference between an optical viewfinder and an electronic viewfinder?
An optical viewfinder shows direct scene light through the lens, so it has no display lag and does not preview exposure or white balance. An electronic viewfinder shows image sensor data on a display, giving you exposure simulation, focus aids, and shooting overlays.
How does a DSLR viewfinder show what the lens sees?
A DSLR uses a camera mirror to send light from the lens upward onto a focusing screen. A pentaprism or pentamirror corrects the projected image, then the eyepiece sends that corrected view to your eye.
Does an electronic viewfinder show the actual exposure before taking a photo?
An electronic viewfinder can show a close exposure preview before capture, but flash, long exposures, extreme low light, picture styles, and display brightness can make the preview differ from the final file. Your histogram and highlight warnings give you stronger exposure clues.
Is it better to use a camera viewfinder or the LCD screen?
An eyepiece viewfinder suits action, harsh sunlight, and steadier handheld shooting. A rear LCD screen suits tripod work, video, low angles, overhead framing, and scenes where placing your eye behind the camera feels awkward.